Posted on

IKEA hack – revamp a step stool

Revamped Ikea Steps photography (c) ellasplace.co.uk

Revamped Ikea Steps photography (c) ellasplace.co.uk

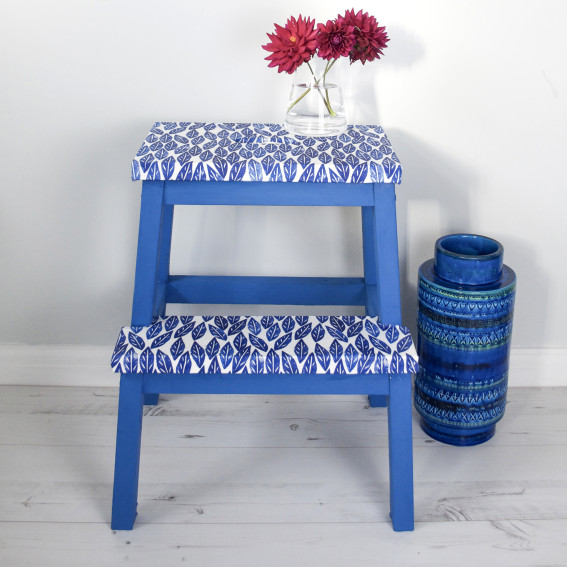
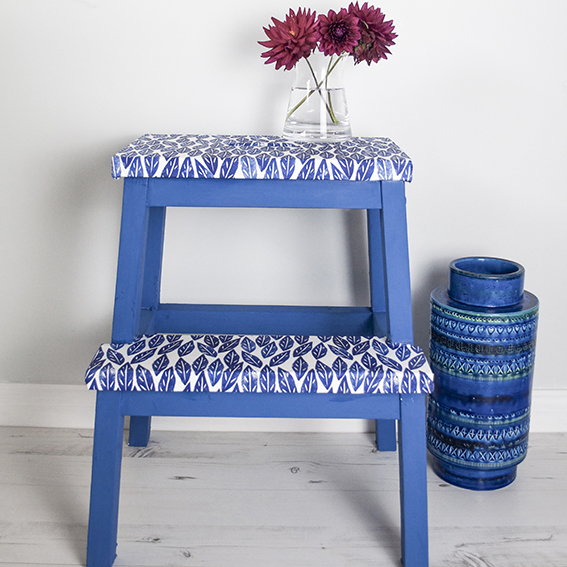
Being only 5ft 4in and a half (the half is very important), the IKEA step stool is my friend. The one above has been particularly well used – especially when we first got it 13 years ago. We lived in a tiny studio flat in London so storage had to be utilised in every space: it went right up to the ceiling. I’ve recently been using the steps in my art studio (another area that makes use of every single square metre of storage), so they’ve got a bit bashed up over the years and were in need of some TLC.

I came across a very sweet revamp project on This Little Street blog, who spruced up a new set of steps with paint and her peel-off wallpaper collection. I thought this idea would work with my Spoonflower fabrics and chalk paint.

Revamped Ikea Steps photography (c) ellasplace.co.uk

Revamped Ikea Steps photography (c) ellasplace.co.uk

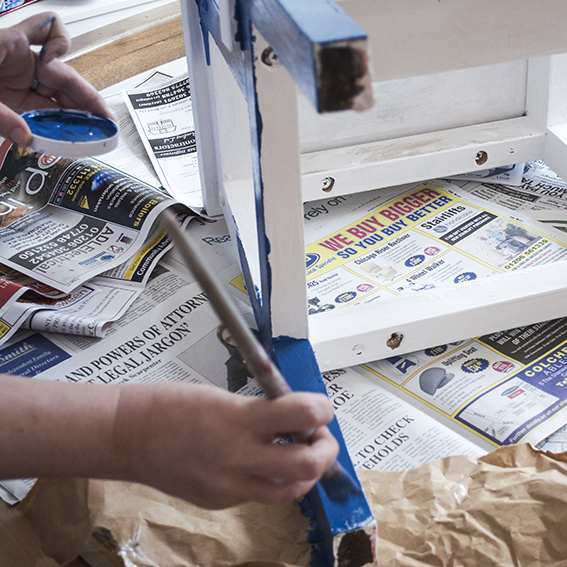
First I had to get these steps into some kind of workable condition. Unlike the Little Street’s upcycle, which used a new set of steps, mine were old, scuffed, split and covered in printing ink and paint. I had to scrape off the paint, sand the surfaces down and treat the steps to some wood primer and a lick of white emulsion.

Revamped Ikea Steps photography (c) ellasplace.co.uk

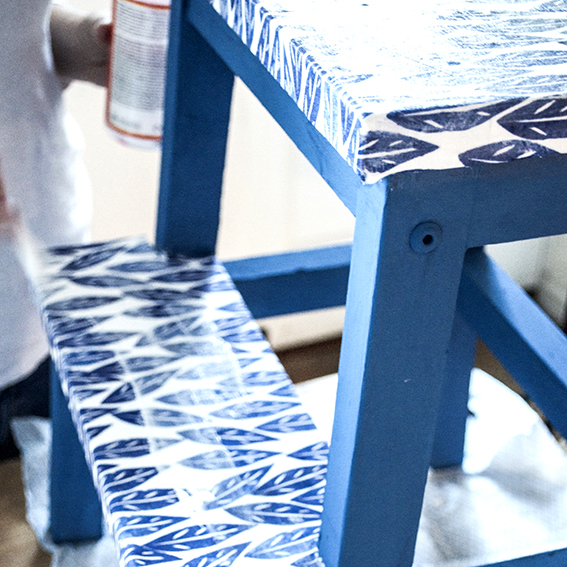
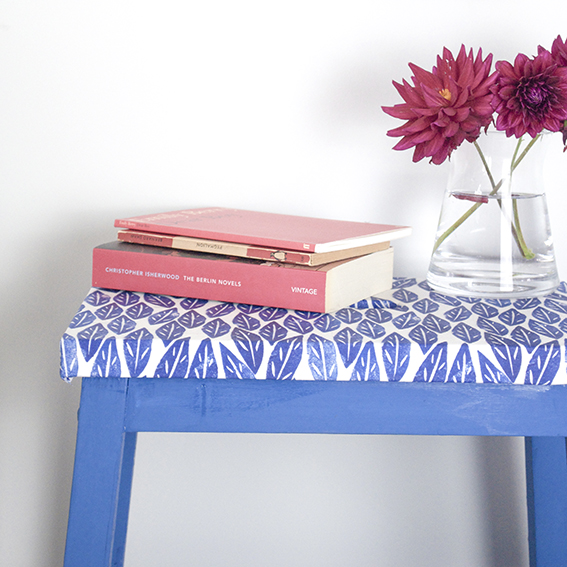
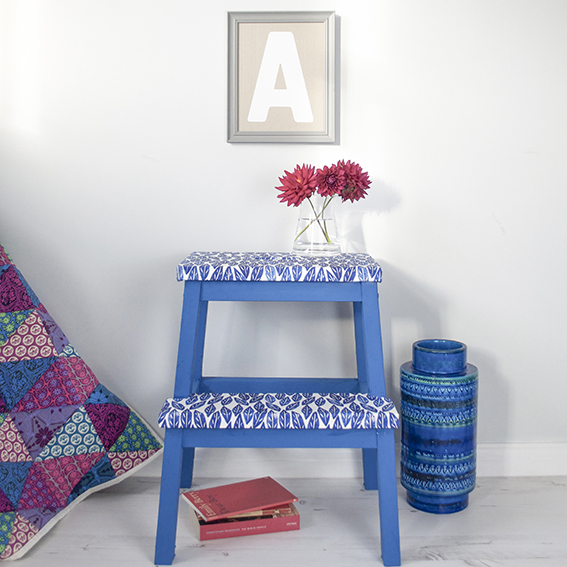
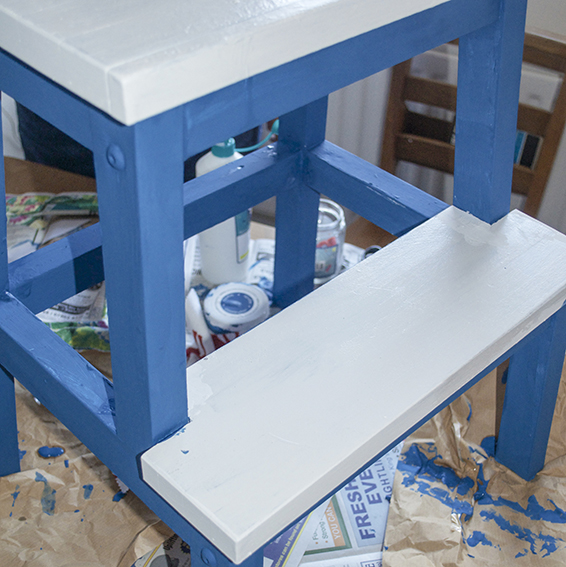
I then painted the frame with Americana Decor® Chalky Finish paint in Legacy, keeping the step and the top white. I then used PVA glue to adhere my blue Scandi leaves material to the white areas and then sealed them in varnish – it means any spills can be wiped off. I’m really pleased with the end result and this once hardworking bit of furniture is now pride of place in our study (where, yes, we have floor-to-ceiling shelves).

Revamped Ikea Steps photography (c) ellasplace.co.uk

Revamped Ikea Steps photography (c) ellasplace.co.uk

Revamped Ikea Steps photography (c) ellasplace.co.ukRevamped Ikea Steps photography (c) ellasplace.co.uk

Revamped Ikea Steps photography (c) ellasplace.co.uk


Posted on

How to organise your craft materials – Part 1

Organise your craft materials part one ellasplace.co.ukI’m not a woman who spends loads of money on handbags and shoes. I’m not even that much of a voracious clothes buyer. No, I spend pretty much all my disposable income on art and craft materials. Here’s how I organise mine.

As I have so much equipment, I need to organise it in two ways. One, as general put it away and keep things neat and tidy when I’m not using it (more of that later). Two, the things for ‘live work’ – stuff I need as I’m working.

Organise your art and craft equipment ellasplace.co.uk

As I mentioned beforeI have an abundance of black Faber Castell India ink PITT artist pens in various nib sizes, plus a load of drawing pencils and probably more scalpels than a woman needs. All of which as an illustrator I need to hand – and all of which I have a habit of mislaying if I don’t have a home for them!

As I’m currently working on my stamped designs as well as my ongoing drawing practice, I have a lot of little fiddly items that I really can’t misplace. There are messy ink pads (in specific colours), scalpel blades and my collection of hand-carved stamps (true one-offs that I really, really don’t want to lose).

These tricky-to-store bits and pieces need a home, and in true crafty fashion I’ve done a bit of upcycling and personalising when it comes to go-to craft room storage.

Organise your craft materials ellasplace.co.uk

All the pens and brushes I’ve got on the go, plus my bookbinding tools, are all stored easily to hand in little tins covered with my red heart fabric. Tins make for great storage – they hold so much, I can see what’s in them and access them easily, plus you can line them up in row to look uniform.

Organise your craft equipment ellasplace.co.uk

My little inky items live in an old chocolate treats tin that is also covered in my red and white fabric. I love using these round containers: you can stack them up for easy organising and you can pop a lid on them to keep everything concealed. I have lots of these in my craft room, either painted or covered in paper and fabric (I’ve been known to colour code these for stamps, floristry stuff, threads and fabric scraps etc).

Organise your craft materials ellasplace.co.ukIt’s easy to cover both types of tin too. I love a bit of decoupage. You simply use a tape measure to work out the circumference and the height, then cut your fabric to these dimensions (I’ve used pinking sheers for this). Then simply cover the tin with strong PVA glue and wrap around to cover the side. For the lidded tin I’ve cut out sections of fabric and layered these over the lid. I’ve then covered all the containers with PVA to seal the fabric and act as a varnish.