Posted on

My Illustrated Christmas Cards


Christmas Stationery Ella Johnston Art and illustration. ellasplace.co.uk

While everyone was sunning themselves this summer I was busy putting together my illustrated Christmas card collections. I’ve got a number of designs available this year ranging from the traditional (we all love a wee robin) to playful (as a veggie I couldn’t help but showcase what most people will be eating at Christmas) to vintage (I’m a huge fan of retro illustration).
Christmas Stationery Ella Johnston Art and illustration. ellasplace.co.uk

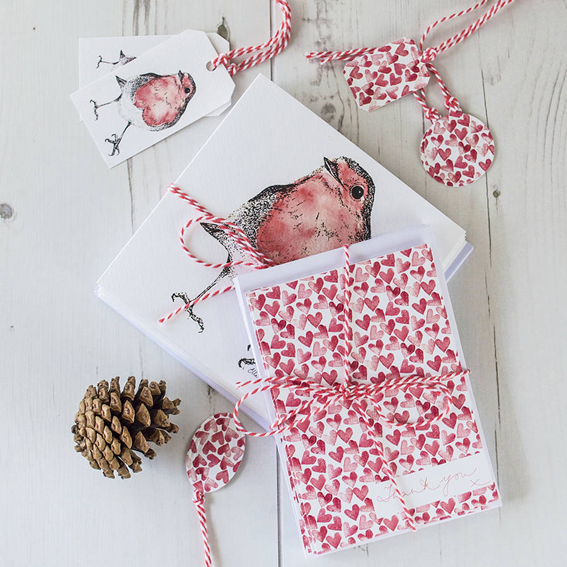
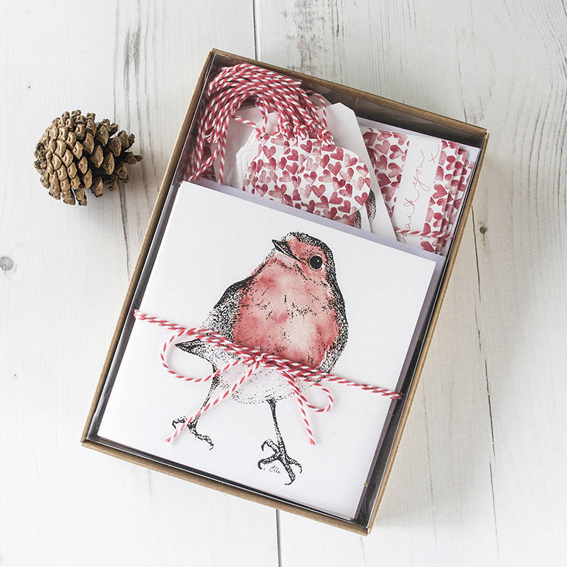
I thought it would be nice to coordinate your Christmas greetings, gifting and thank you notes with my Festive Robin Stationery Box Set.

This year the robin was crowned the nation’s favourite bird in the National Bird Vote – so my festive motif featured on greetings and gift tags is sure to be a real favourite with friends and family and a time-honoured way of ‘tweeting’ your Christmas wishes.

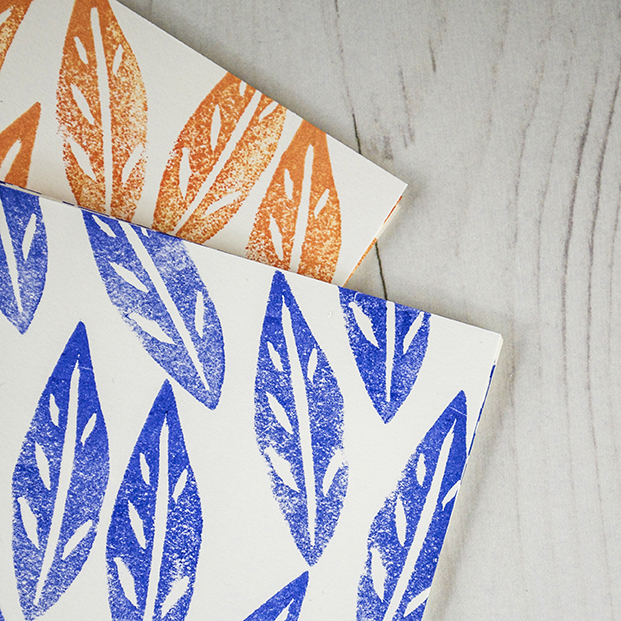
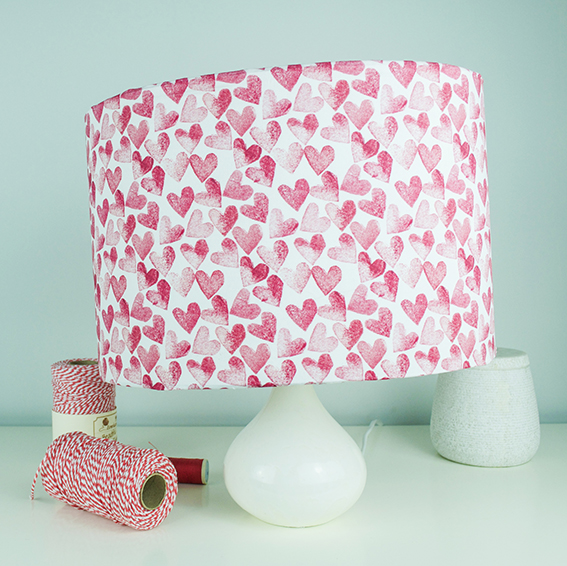
In a Scandi-inspired theme of red and white, the pack also features a simple heart motif print, designed and printed by me. The pack features ten illustrated Robin Christmas greetings, ten thank you notecards and ten Robin gift tags. You can take a look at it here.
Christmas Stationery Ella Johnston Art and illustration. ellasplace.co.uk
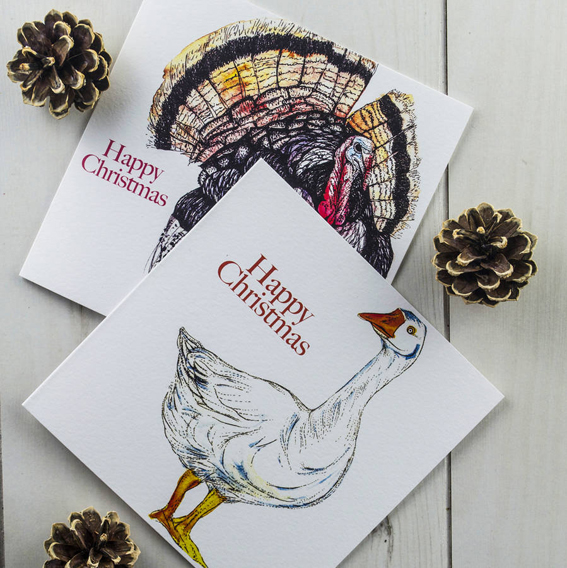
I’ve got a pack of 10 illustrated Goose and Turkey Christmas cards (five of each) so you can send a season’s greeting with a cheeky twist. Get your set hereSo what better way to say ‘Season’s Greetings’ than with a lovingly drawn illustration of the creatures that are kindly sacrificing themselves to ensure your Christmas dinner is absolutely perfect; a fattened goose and succulent turkey?

Christmas Stationery Ella Johnston Art and illustration. ellasplace.co.uk

My pack of 10 vintage inspired Christmas cards was inspired by old designs of the 1950s and 60s. There were lots of baubles, bells and kitsch motifs (which I adore). I wanted to see if I could do something similar so I went to the shed and pulled out all my old decorations and got drawing. Check out how you can get yours here

Christmas Stationery Ella Johnston Art and illustration. ellasplace.co.uk

Posted on

How to make a book in eight easy steps

If you are anything like me you’ll have loads of spare bits of patterned, or even plain, card and reams of paper lying around. I’ve got a great little Japanese stab-bound book project that uses up all your stash and is brilliant for when you want to make handmade gifts for people.

So here’s how to make a book in eight easy steps. I’ve screenprinted one of my bird illustrations onto a card cover of my book but you can make yours with anything you like.

Handmade book (c) Ella's Place


YOU WILL NEED
Awl
Ruler
Pencil
Two sheets of A6 card for your cover
15 sheets of 120gsm A6 paper
Book-binding thread and needle
Rough paper (same size as your book pages and card)

(c) Ella's Place1: Use rough paper to make a template. With a ruler, draw a line from top to bottom of the rough at 1cm from the spine. Starting 1cm from the top, mark off an even number of points spaced evenly on that line.

(c) Ella's place

2: Working on a hard, flat surface. Use the awl to make holes in the intersections as shown – I’m protecting my table (and my hands) by placing the paper on a cork board so the awl can ‘sink in’.

(c) Ellas place

(c) Ellas place

3: Place the front cover card underneath the template, holding or clipping the front edge to keep from moving. Protect your work surface as you punch a hole at each of the marked points using an awl. Repeat for the back cover.

(C) Ellas place(c) Ella's Place
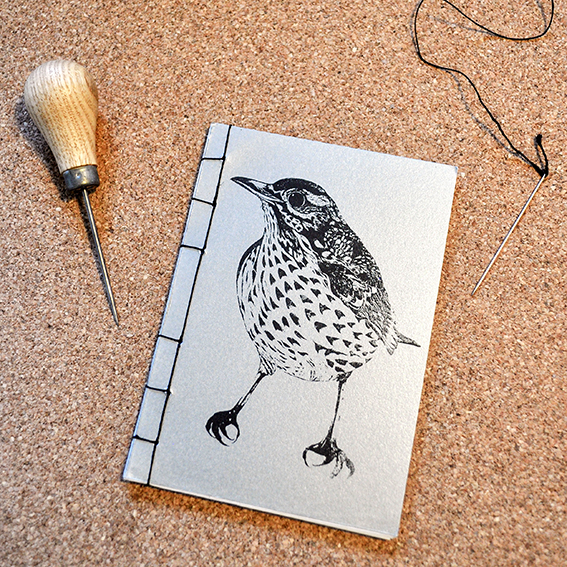
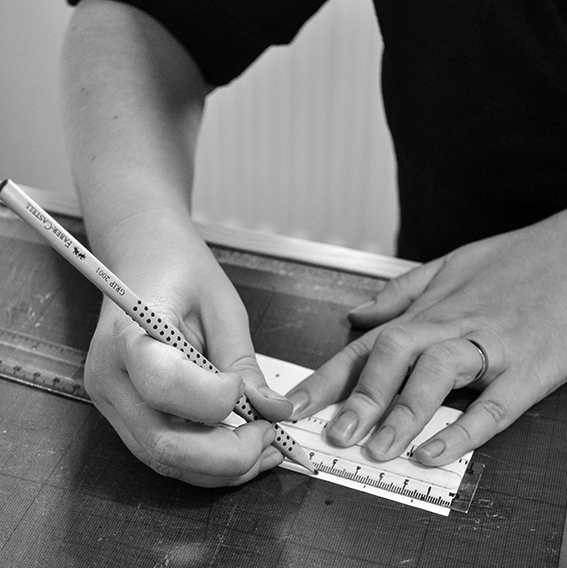
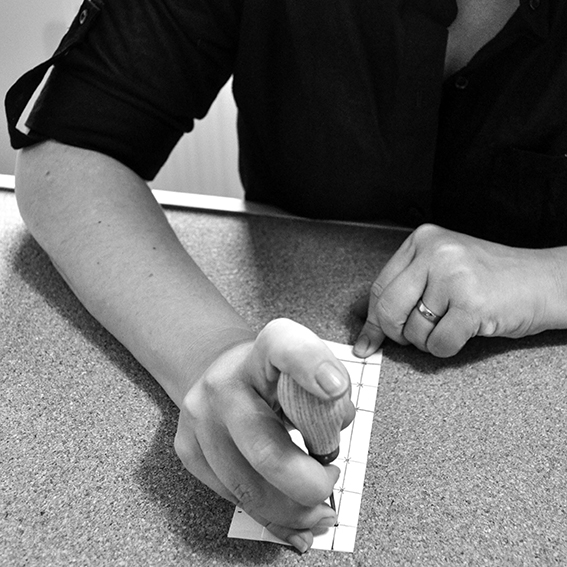
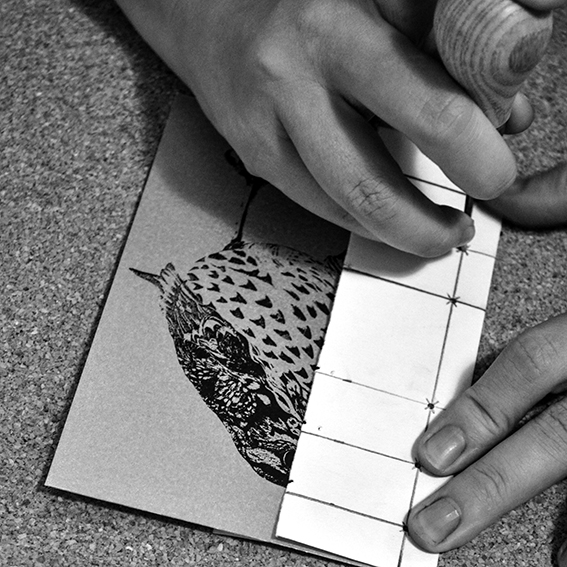
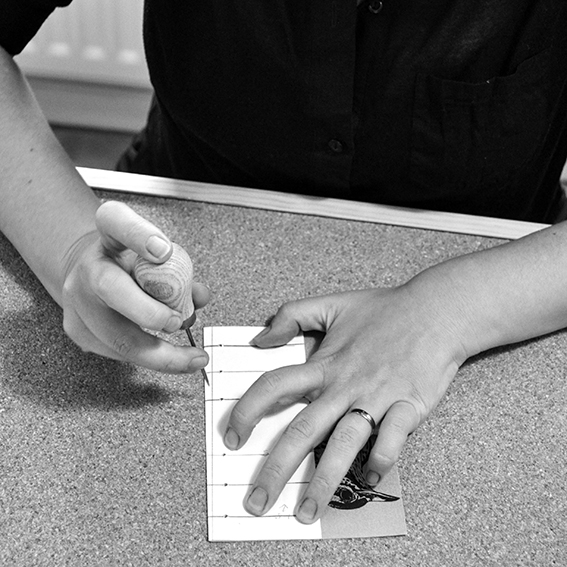
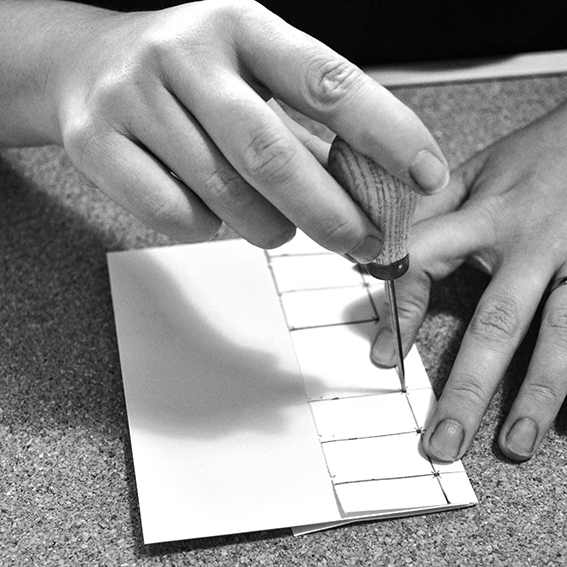
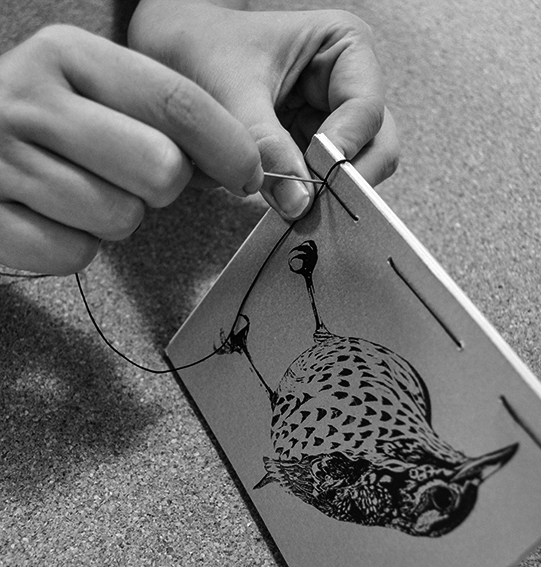
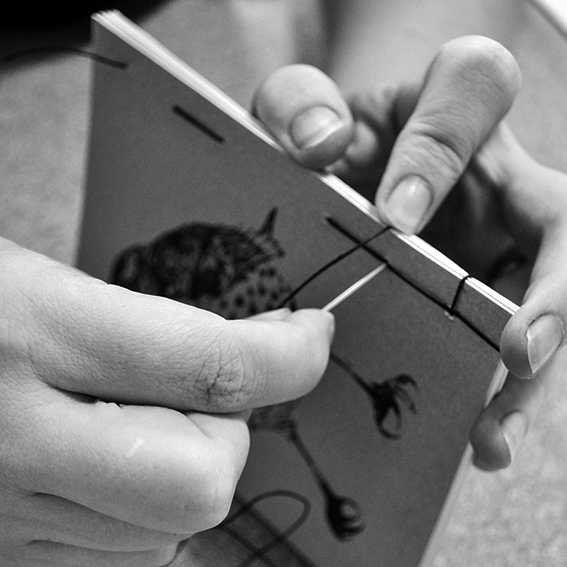
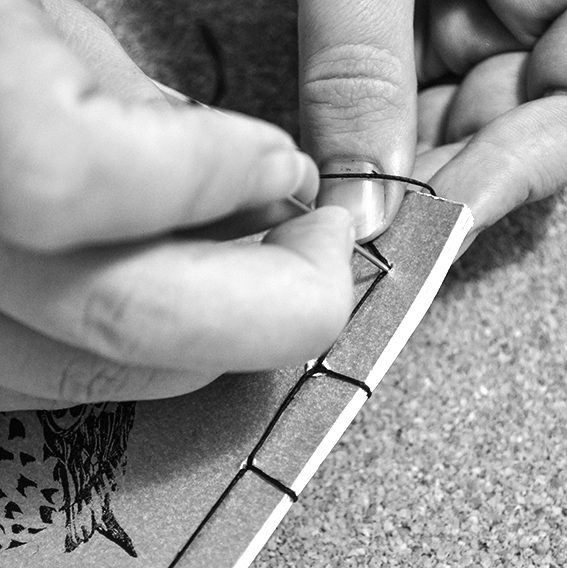
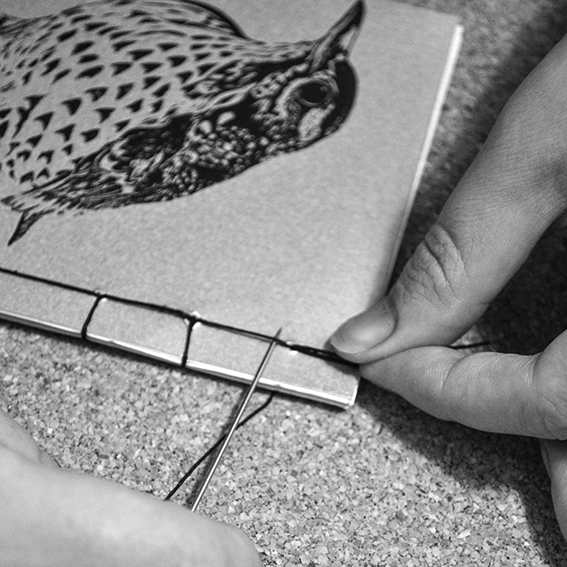
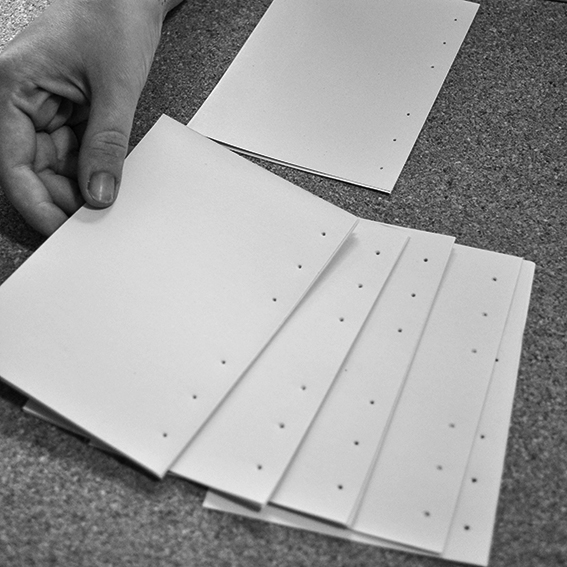
4: Place a quarter of the book pages underneath the template and make holes as shown. Continue with the remaining pages doing quarters at a time. The pages and cover should all look the same once punched.

(c) Ella's Place

(c) Ella's Place5: Put all the pages, including the front and back covers, together. Thread the needle through the top back hole of the book, leaving some thread loose. Make a running stitch along the holes in the book, pulling the thread tight each time through a hole while keeping your top thread loose.

(c) Ella's Place

6: Loop the thread at the bottom of the book’s spine and go through the bottom hole. Place the book on its side, loop around the top of the spine and go through the bottom hole again.

(c) Ella's Place

7: Do a running stitch into the next hole, loop around the top of the spine and go through that hole again on to the next hole. Repeat until you get to the top of the book.

(c) Ella's Place

(c) Ella's Place

(c) Ella's Place8: Make a loop at the top of the book and go through the top hole. Slip the needle under two of the top bindings coming out of starting hole. Tie a tight knot with the original loose thread.

(c) Ella's Place

Look – you’ve made a book!

Posted on

How to organise your craft materials – Part 1

Organise your craft materials part one ellasplace.co.ukI’m not a woman who spends loads of money on handbags and shoes. I’m not even that much of a voracious clothes buyer. No, I spend pretty much all my disposable income on art and craft materials. Here’s how I organise mine.

As I have so much equipment, I need to organise it in two ways. One, as general put it away and keep things neat and tidy when I’m not using it (more of that later). Two, the things for ‘live work’ – stuff I need as I’m working.

Organise your art and craft equipment ellasplace.co.uk

As I mentioned beforeI have an abundance of black Faber Castell India ink PITT artist pens in various nib sizes, plus a load of drawing pencils and probably more scalpels than a woman needs. All of which as an illustrator I need to hand – and all of which I have a habit of mislaying if I don’t have a home for them!

As I’m currently working on my stamped designs as well as my ongoing drawing practice, I have a lot of little fiddly items that I really can’t misplace. There are messy ink pads (in specific colours), scalpel blades and my collection of hand-carved stamps (true one-offs that I really, really don’t want to lose).

These tricky-to-store bits and pieces need a home, and in true crafty fashion I’ve done a bit of upcycling and personalising when it comes to go-to craft room storage.

Organise your craft materials ellasplace.co.uk

All the pens and brushes I’ve got on the go, plus my bookbinding tools, are all stored easily to hand in little tins covered with my red heart fabric. Tins make for great storage – they hold so much, I can see what’s in them and access them easily, plus you can line them up in row to look uniform.

Organise your craft equipment ellasplace.co.uk

My little inky items live in an old chocolate treats tin that is also covered in my red and white fabric. I love using these round containers: you can stack them up for easy organising and you can pop a lid on them to keep everything concealed. I have lots of these in my craft room, either painted or covered in paper and fabric (I’ve been known to colour code these for stamps, floristry stuff, threads and fabric scraps etc).

Organise your craft materials ellasplace.co.ukIt’s easy to cover both types of tin too. I love a bit of decoupage. You simply use a tape measure to work out the circumference and the height, then cut your fabric to these dimensions (I’ve used pinking sheers for this). Then simply cover the tin with strong PVA glue and wrap around to cover the side. For the lidded tin I’ve cut out sections of fabric and layered these over the lid. I’ve then covered all the containers with PVA to seal the fabric and act as a varnish.

Posted on

How to show you care… write a letter, send a card

Ella Johnston Stationery collection (c) Ella Johnston ellasplace.co.uk

I love letter writing and I like sending friends and colleagues little notes and cards.

Handwritten messages are a wonderful thing. It’s a real delight to receive a handwritten letter or card, so much better than a text or an email. Plus you can keep a handwritten piece – I store my favourites in a little box and if they’re particularly lovely, I display them on my kitchen pin-board.

That’s why I like to make stationery that is really special – one you can send yourself or give as gifts to others. For this handprinted collection, I’ve drawn and carved out a leaf design on a rubber block then used rich pigment ink to colour it. I’ve then stamped the motifs over quality card and paper to create a stationery set that is unique every time. Just like a piece of handwriting.

Handprinted stationery (c) Ella Johnston ellasplace.co.uk

I currently have two products using this technique – a stationery box set and a notecard box set.

The stationery set has ten leaves of A5 size handprinted writing paper, five A6 handprinted postcards, 15 handprinted envelopes and ten recycled handprinted paper gift tags.

Handprinted Stationery (c) Ella Johnston ellasplace.co.uk

The notecard box contains ten leaf postcards, five in orange, five in blue.

My leaf stationery sets are available to buy on Not On The High Street.

Handprinted stationery (c) Ella Johnston ellasplace.co.uk

Posted on

DIY: make your own lampshade

Red heart lampshade (c) Ella Johnston www.ellasplace.co.uk

I’m embracing the DIY ethic this month and have just made a really easy lampshade with my own fabric. I have to say I’m very pleased with it – and you can easily make one too.

This summer I’ve been creating new designs using a rubber block print technique. I simply draw, then carve out a motif from a block, ink it up and start making lovely prints with it.

These block prints look great when translated into fabric design so, after ordering a few designs from my Spoonflower shop, I used my red heart fabric to make a lampshade.

To make the shade I used a 20cm Oval Lampshade Making Kit from Needcraft. I’ve worked with the round lampshade kits before and found them really straightforward to make with, so I branched out this time with a slightly  more unusual shape. The kits contain two lampshade rings (one with the fitting), one self-adhesive lampshade panel (to adhere your cover onto), self-adhesive tape and a rolled edge tool for finishing – all you need to do is add fabric to cover. It’s as easy as that. As with the other kits the picture instructions and step-by-steps were easy to follow so the shade was made in around 15 minutes.

I didn’t want a pendant shade and, because I wanted my creation to have maximum impact, I chose a small base so my hearts take centre stage. Of course your choice of base is down to you. If you have a lamp base that could do with an upgraded shade, I’d really recommend it.Red heart lampshade (c) Ella Johnston www.ellasplace.co.uk


Posted on

Creative ways with watercolour… birds

Watercolour by Ella Johnston

I’m treating you to a sneaky preview of some illustrations I’m working on at the moment. They are not finished by any stretch but I thought you may be interested in seeing them in their ‘raw’ state.

I’ve been trying out some creative ways of adding texture and colour to my avian drawings with watercolour paints for some time now. I feel that this painterly method creates further interest and depth when illustrating the individual bird’s plumage than a line drawing. I also think it imbues a sense of vitality and movement in the composition. It’s also really simple to achieve.

Watercolour by Ella Johnston

My illustrations are made on non-textured watercolour paper – it has a lovely quality that absorbs water and ink really well. I first draw a light sketch of my subject in pencil, loosely highlighting key areas in pencil. Then I apply layer of watercolour washes to the illustration. Each layer is very watered down and I like to build up the colours gradually – this gives me more interesting colour combinations and a pleasing overall texture. Once I’m happy with the colour, I leave this to dry before applying a detailed ink drawing over the top.

Watercolour by Ella Johnston

You’ll be able to see the finished drawings in a book of wading birds published by Dunlin Press next year.

Watercolour by Ella Johnston

Posted on

Beginner’s guide to the succulents plant trend

They’ve featured everywhere in style magazines recently, but what exactly is a succulent, and how can make them work for you? Here’s my quick guide.Ella Johnston #drawings of #succulent #plants at http://www.ellasplace.me

What is a succulent?
They are plants adapted for arid conditions where they might need to store water to survive. To do this, succulents have thick, fleshy leaves. They come from all round the world – cacti from desert regions and Alpine plants that are more commonly seen in garden rockeries. It’s something of a catch-all, umbrella term, however, and sometimes cacti with needles are though of separately. My drawing, above, illustrates some of the common species of succulent – there are many, many variations within each species.

#Succulent plants pictured at http://www.ellasplace.me
Succulents at Ella’s Place.

Are succulents easy to care for?
Yes. This perhaps explains some of their popularity. They’re easy to pick up from the local garden centre or florist (the ones above came from my local florist and B&Q!). Unlike some plants, they’ll cope with a little neglect. Generally, they like moisture but not being overwatered. Let them dry out completely between waterings and never let the the soil get soggy. If you’re planting outdoors, make sure the soil has good drainage. If they’re in a pot, make sure it has drainage holes in the bottom.

So are they really outdoor or indoor plants?
Some succulents are hardy and fit to survive northern European climates all year round. Some are from tropical regions that need to be looked after indoors over winter. Check the plant label to see which type of succulent you’ve got. Hardy plants can also be grown indoors, of course, and it’s really this that inspires the current trend. They’re great for small spaces and will be happy brightening a windowsill in any room of the house, as well as being a natural point of interest on a vintage sideboard or bookshelf.

How do I style them to look their best?
The fleshy leaves and range of shapes and colours of succulents means they’re already impressive-looking plants. Try grouping them together against a clean background to show off their various forms and textures.

#Succulent plants via theselfsufficientliving.com http://www.ellasplace.me
Via theselfsufficientliving.com

Succulents look great in vintage glassware and ceramics – the silver glassware below reflects the foliage to fantastic effect.

#Succulent plants #vintage at http://www.ellasplace.me via http://www.bhg.com
Via bhg.com

The mini terrariums, below, would look great hanging in a quiet kitchen space.

#Succulents #terrariums at http://www.ellasplace.me via  http://www.homelife.com.au
Via homelife.com.au

And here’s my own test for any flower, foliage and plant trend: does it work for a wedding? The answer, as seen below in a table setting, is yes. Stunning!

#Succulent #wedding table setting at http://www.ellasplace.me via romanceweddings.co.uk
Via romanceweddings.co.uk
Posted on

The Nation’s Favourite Bird 2015

Robin illustration (c) Ella Johnston

The robin has been crowned the nation’s favourite bird in the National Bird Vote.

More than 224,000 people took part in the poll, the result of which was announced today.

As someone who loves birds and drawing them, this vote was of real interest to me. It was organised by ‘urban birder’ and Springwatch contributor David Lindo and polls closed on the day of the general election. Thirty four per cent voted for the robin – a garden favourite – with the barn owl coming second and the blackbird taking third place.

My favourite bird, the puffin, came tenth.
Puffin illustration (c) Ella Johnston

The result didn’t particularly surprise me as my robin cards and garden bird cards have been hugely popular for a little while now –  you can check them out on my Not On The High Street Shop.

Garden Bird Cards (c) Ella Johnston

Robin Card by Ella Johnston

Here’s the National Bird Vote top ten in full
1 Robin
2 Barn Owl
3 Blackbird
4 Wren
5 Red Kite
6 Kingfisher
7 Mute Swan
8 Blue Tit
9 Hen Herrier
10 Puffin

Posted on

My Drawing Kit

Ella Johnston's drawing kit

If you listen to Desert Island Discs on Radio 4, you’ll know that you get to choose eight music tracks, a book and a luxury, to save your sanity in your new life as a castaway. Well, my music tracks and book selections pretty much change every month, but my luxury has been the same for the past 20 years – namely a never-ending supply of the stuff pictured above; my drawing kit.

Ella Johnston Art & Illustration
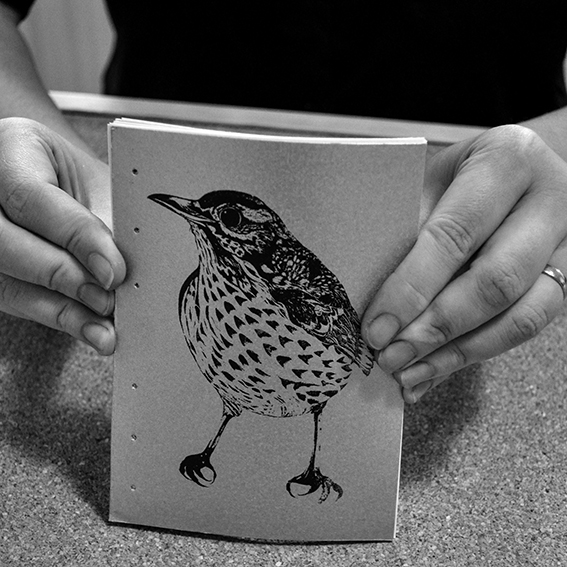
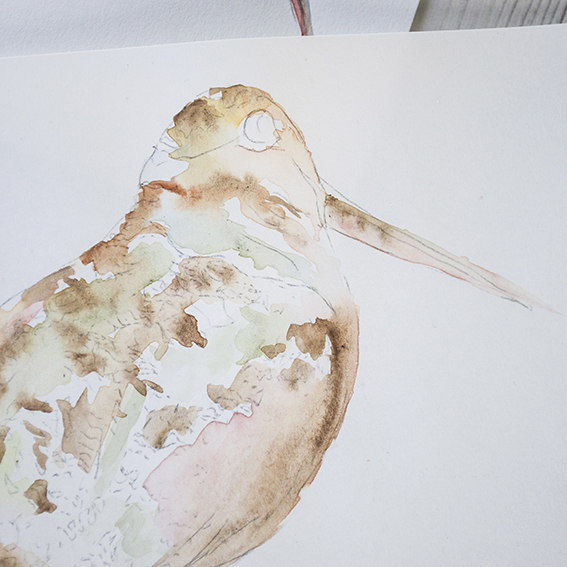
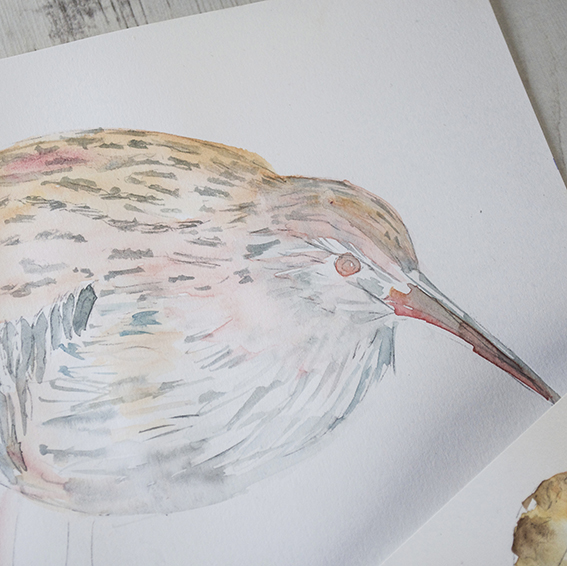
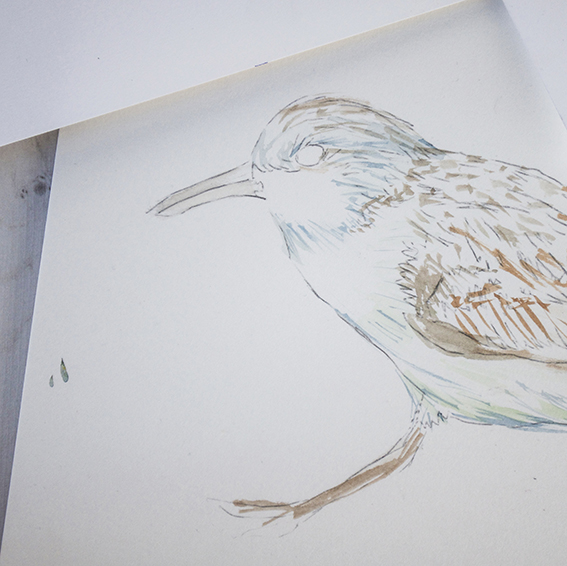
Every one of my illustrations starts with this. I draw my initial motif in pencil on high-quality watercolour paper. I then apply washes of watercolour with a broad brush, adding little touches of detail colour while the wash is still wet with a thinner brush.

(c) Ella Johnston ArtDrawing (c) Ella Johnston

Once I’m happy with the colour, I leave it to dry and then set about putting an inky line over the composition. Years ago I used liquid Indian ink with a nib, but it was a messy process (all the sides of my hands would get covered in ink due to the way I hold the pen) and it also produced some inconsistencies in the final image. So I switched to fibre tips and have never looked back.
Drawing (c) Ella Johnston

Faber Castell India ink PITT artist pens  and Uni-ball fine line pens are my favourite to draw and write with (I love handwriting – more about that later) and I’ve built quite a stash of them – in fact you will find at least one of this type of pen in every bag I own and in practically every room in the house. Dr B sometimes says he sees them in his dreams. I mainly use the fine, small and extra small nib for my work – their precision is excellent and I really like the way their ink is absorbed into the paper. I couldn’t be without them.

Drawing (c) Ella Johnston