Posted on

The Orphaned Spaces box set

The Orphaned Spaces box set. Featuring postcards, hand-stitched books, seeds, reliquary, archival prints.

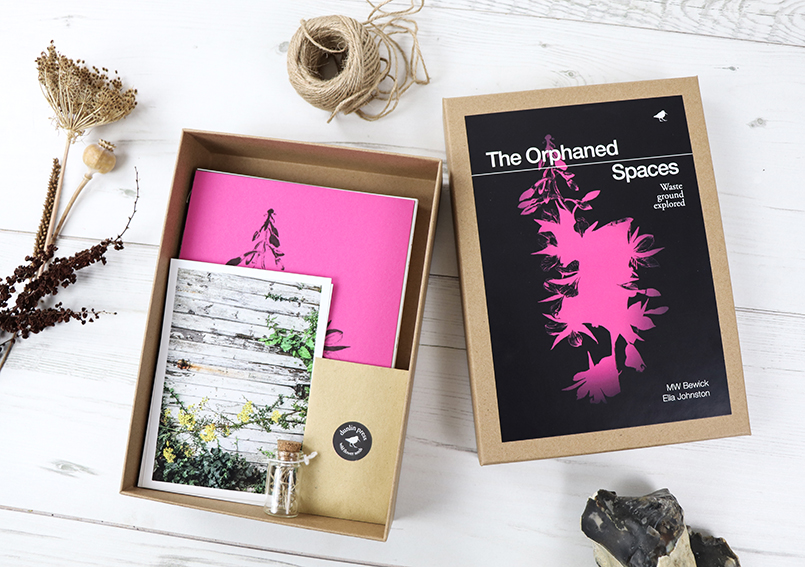
Last week I told you about my new illustrated book (with MW Bewick), The Orphaned Spaces published by our indie publishing company Dunlin Press, well here is the box set.

The Orphaned Spaces box set. Featuring postcards, hand-stitched books, seeds, reliquary, archival prints.

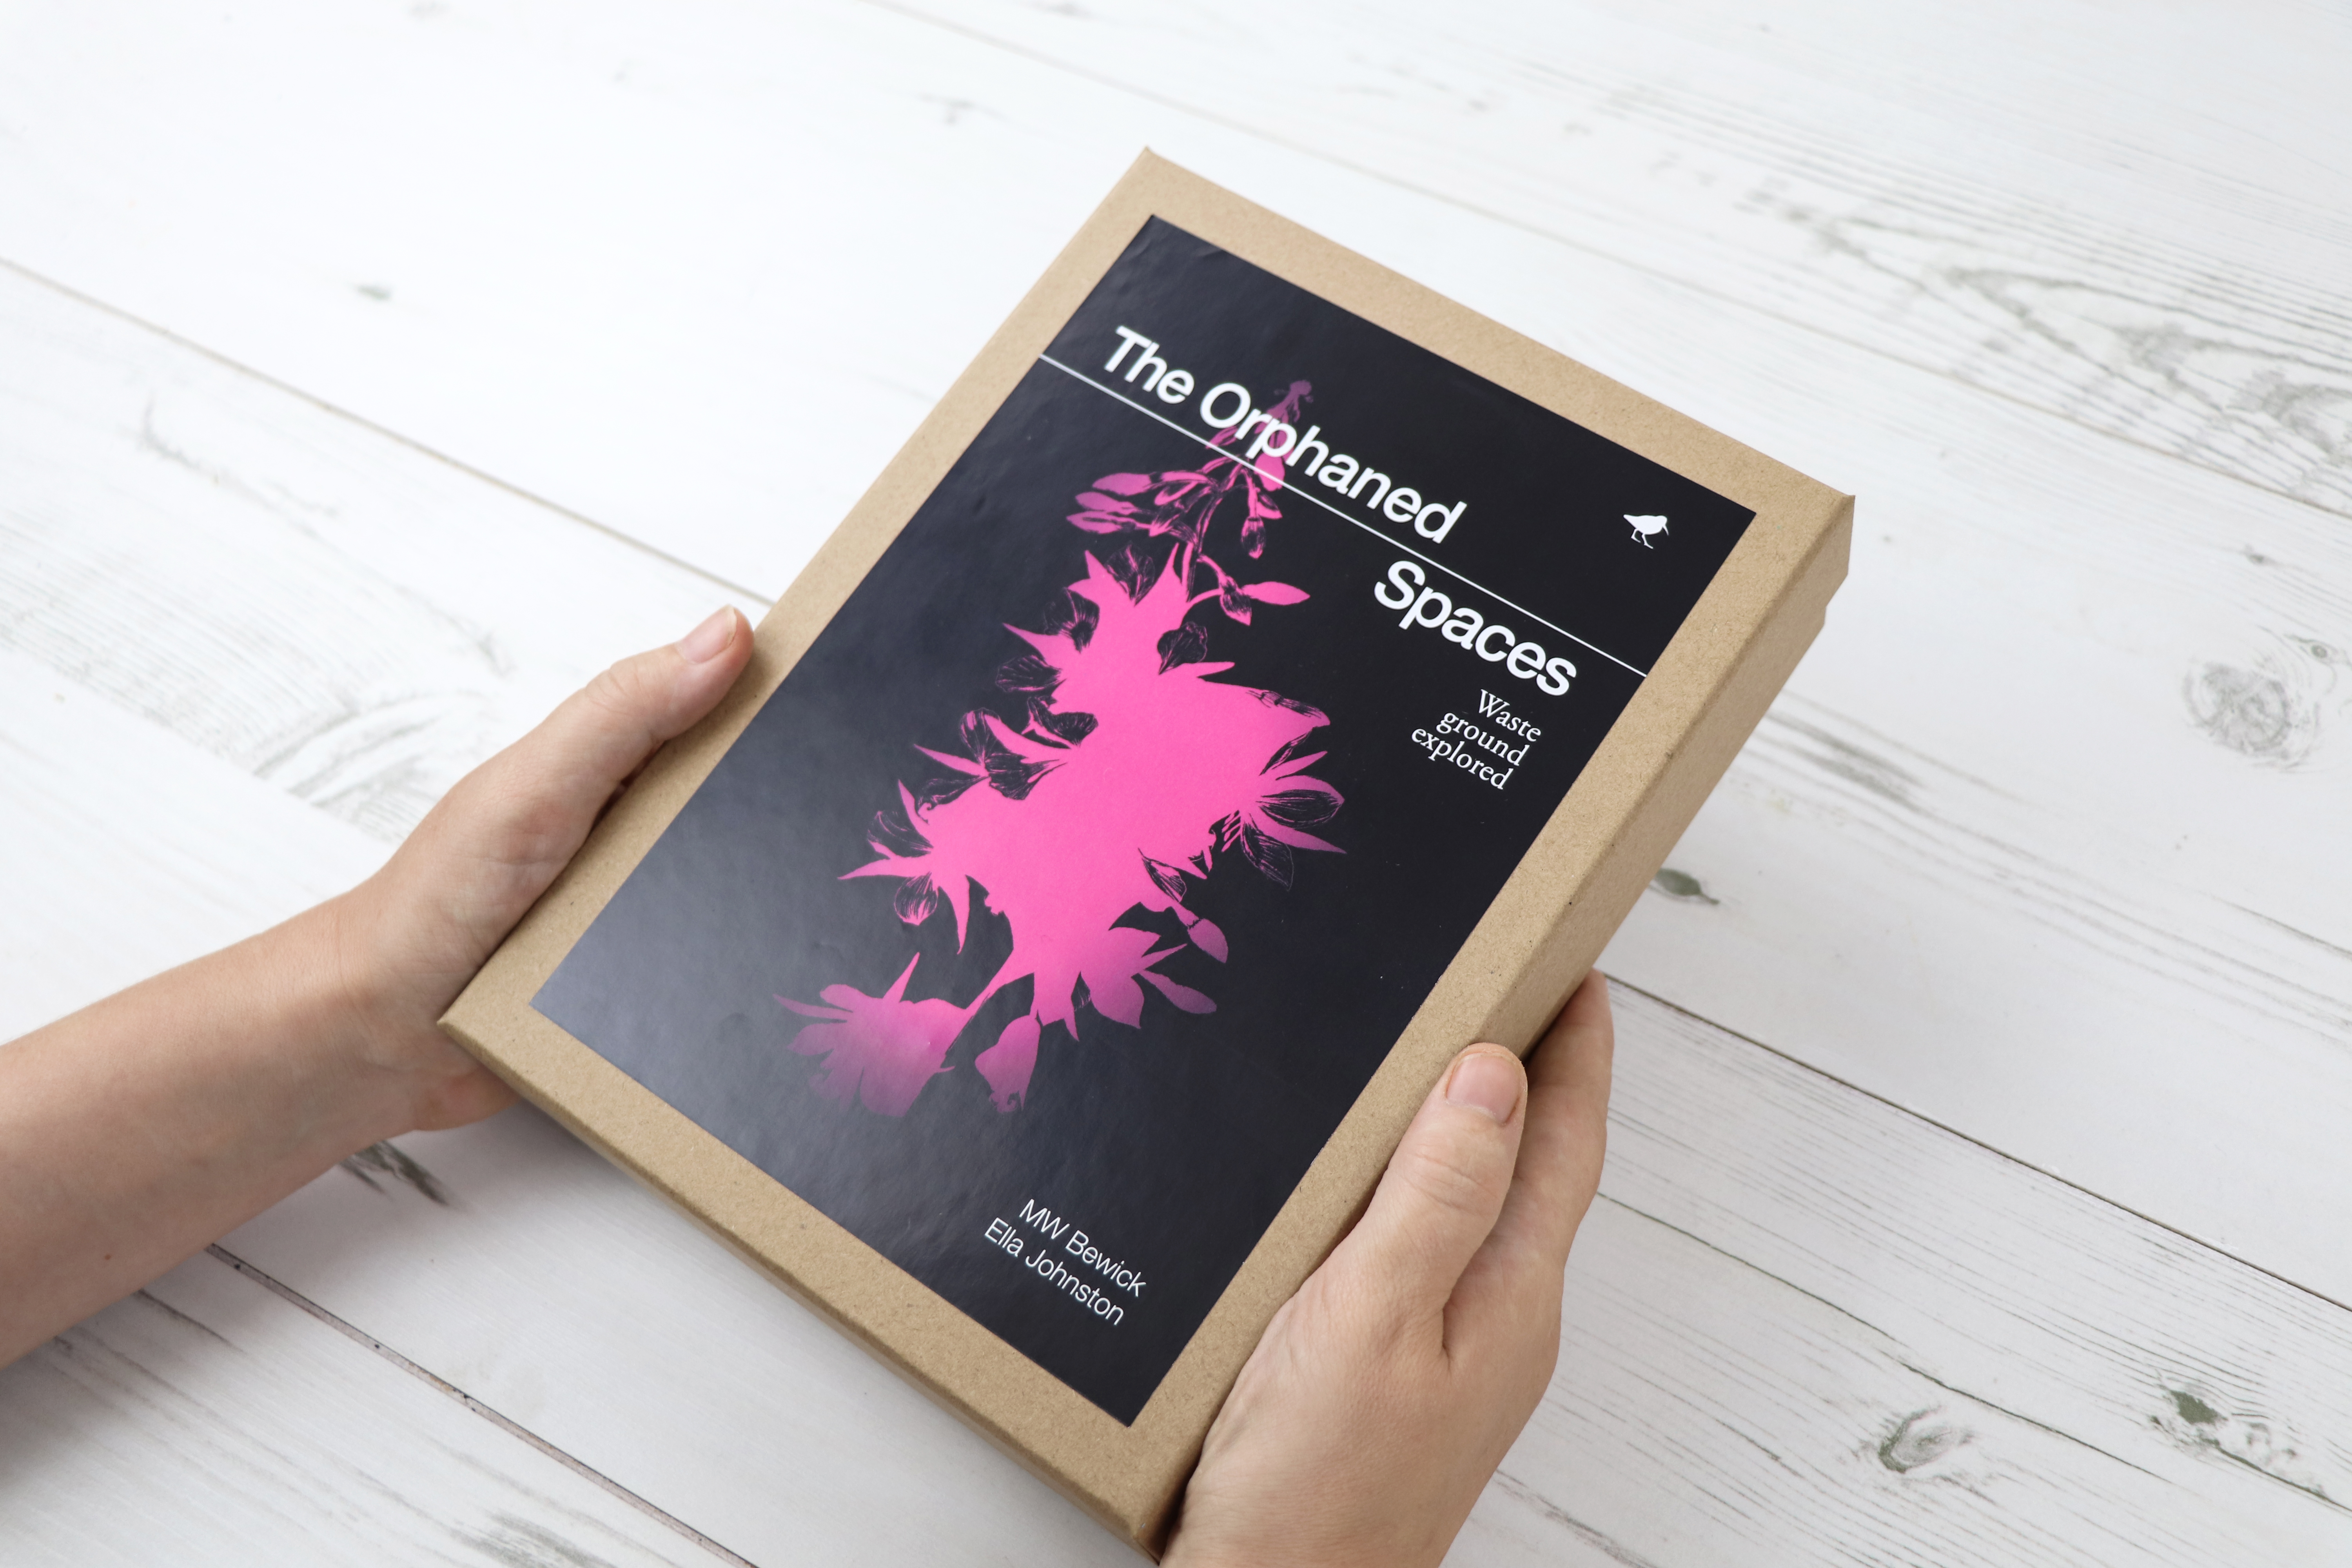
The Orphaned Spaces  box set is such an undertaking of work that I had to give it a separate post.

When working on Dunlin Press projects,  we’ve often described each book as ‘time capsules’. We aim for every publication to embody the mood and spirit of a place or region at a particular period of human history – like pressing a pause button or taking a picture. The Orphaned Spaces box set is a physical manifestation of this concept.

Hand-stitched still lives booklet
Limited edition postcards, reliquary, seeds and archival prints. The Orphaned Spaces Box Set

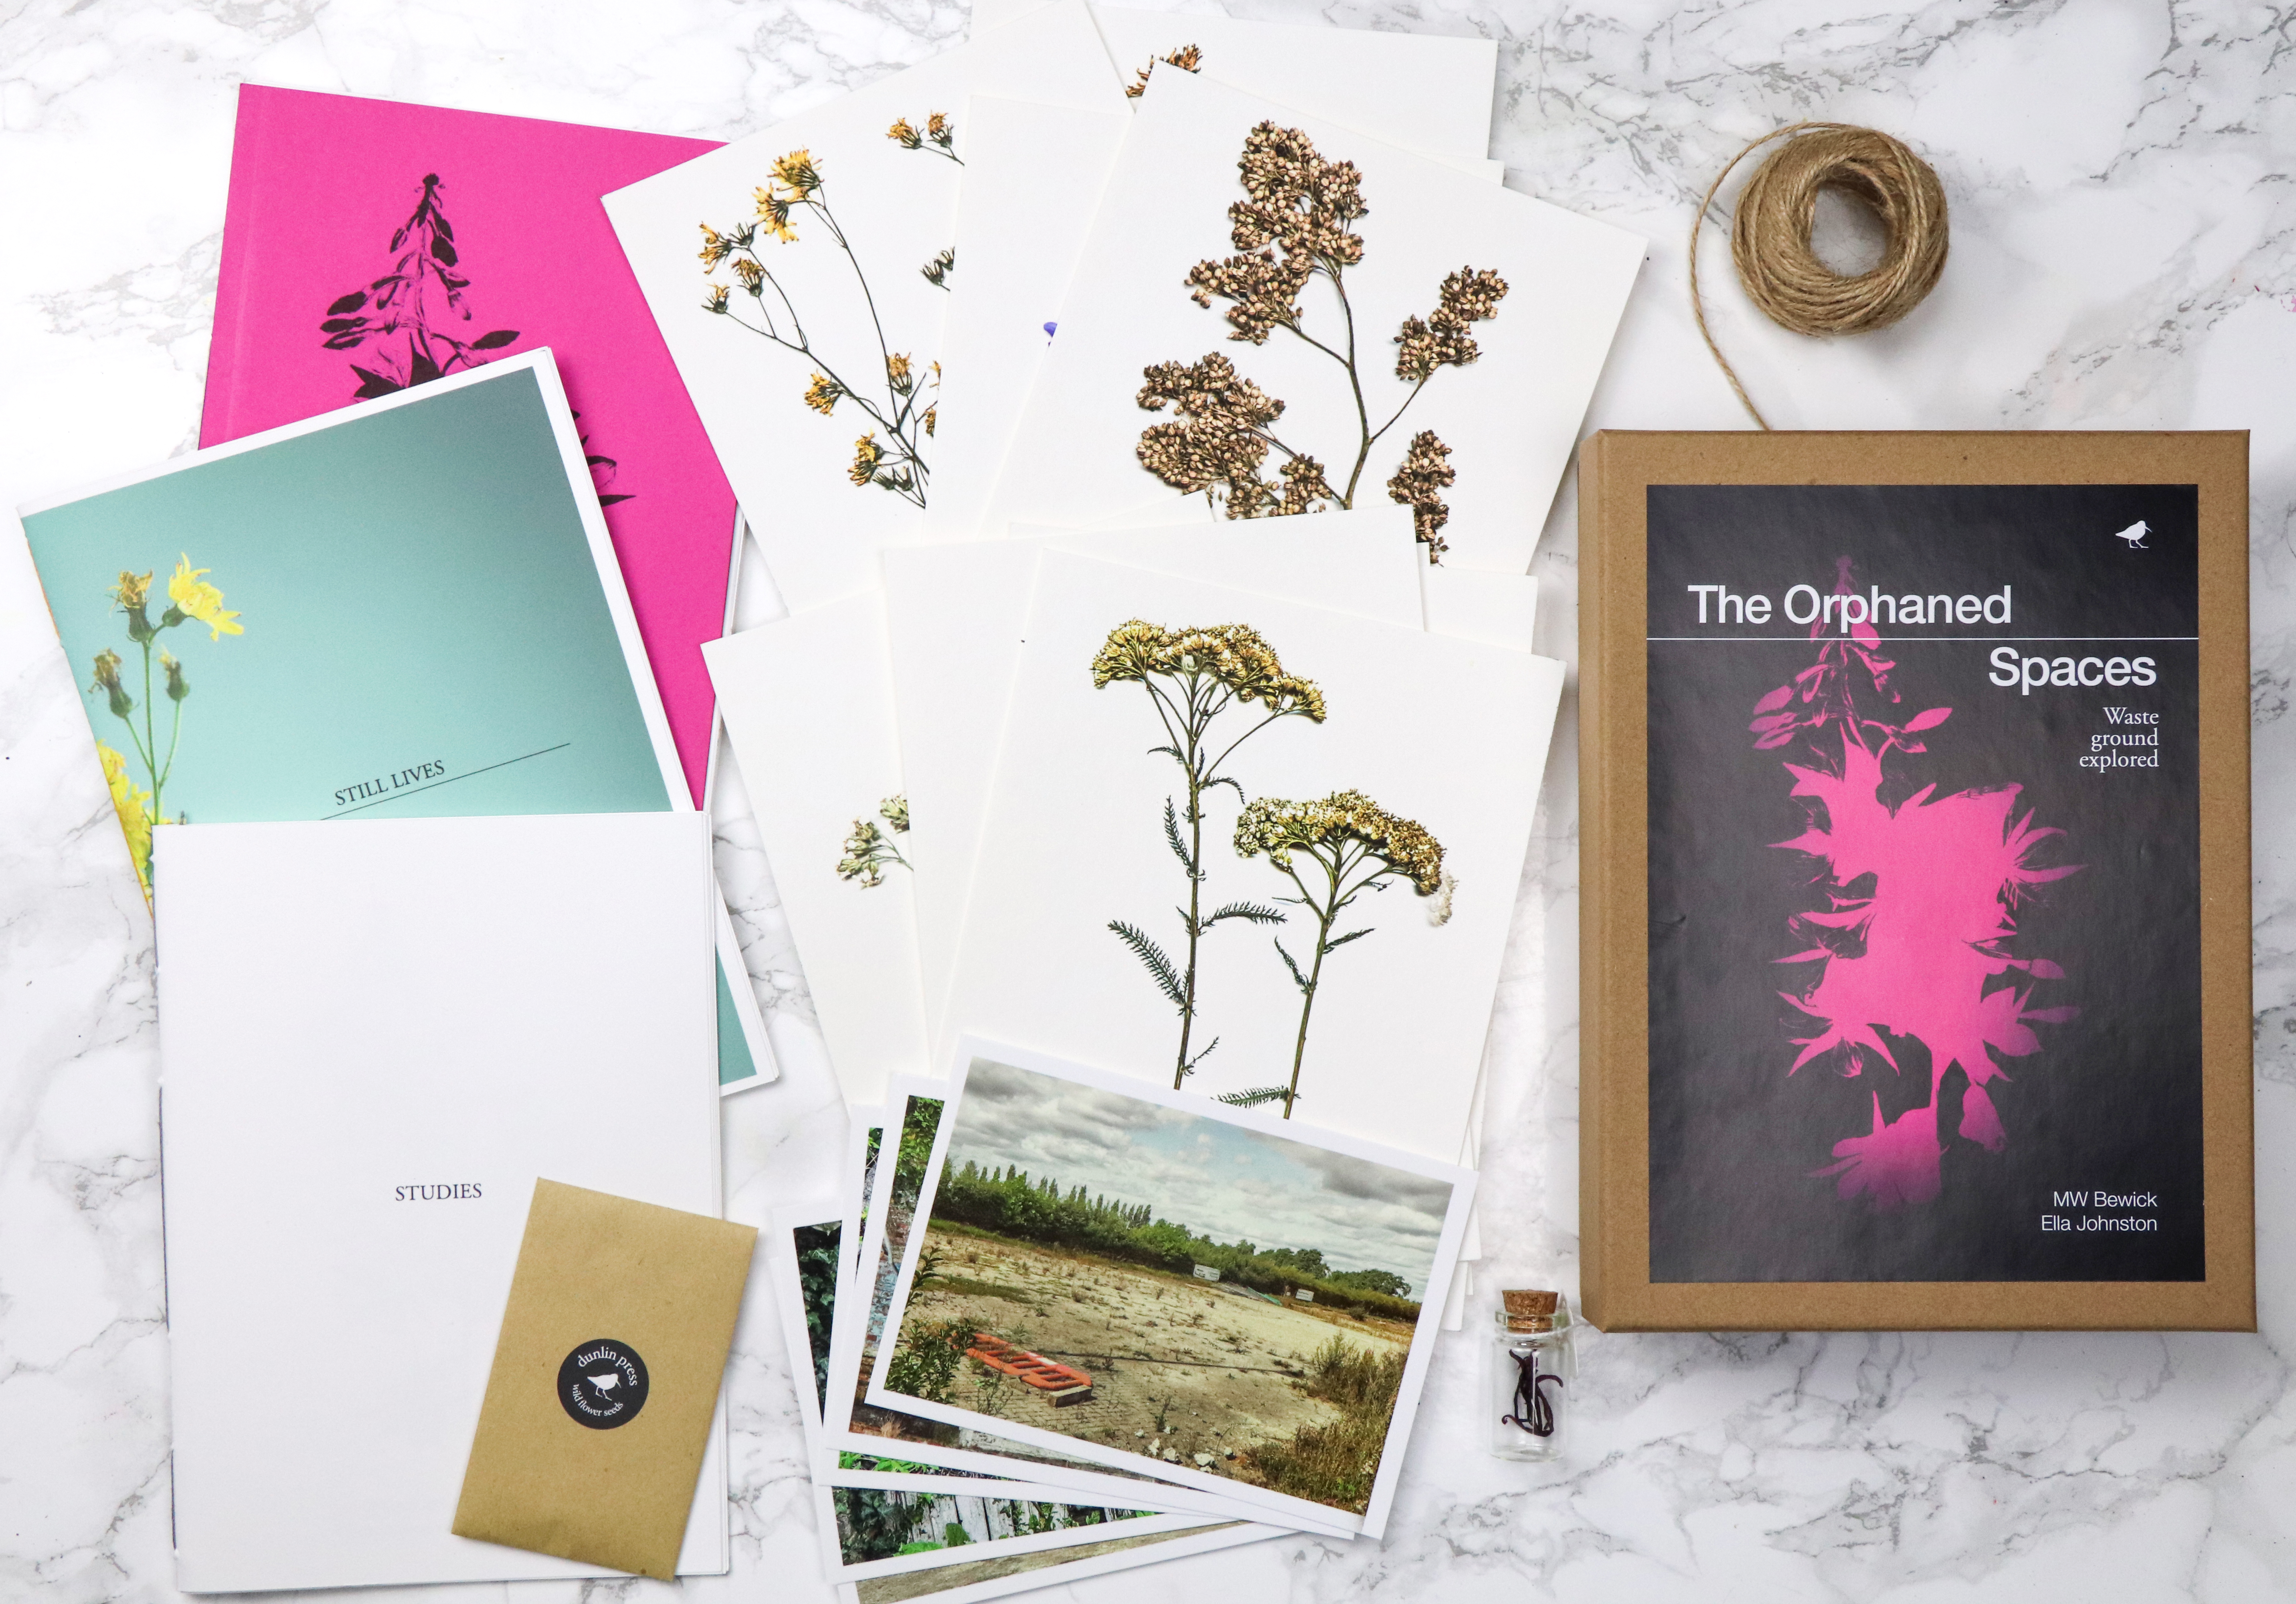
This highly limited edition, made-to-order box set, deconstructs the book The Orphaned Spaces, breaking it down into hand-stitched booklets, postcards, archival prints and a reliquary.

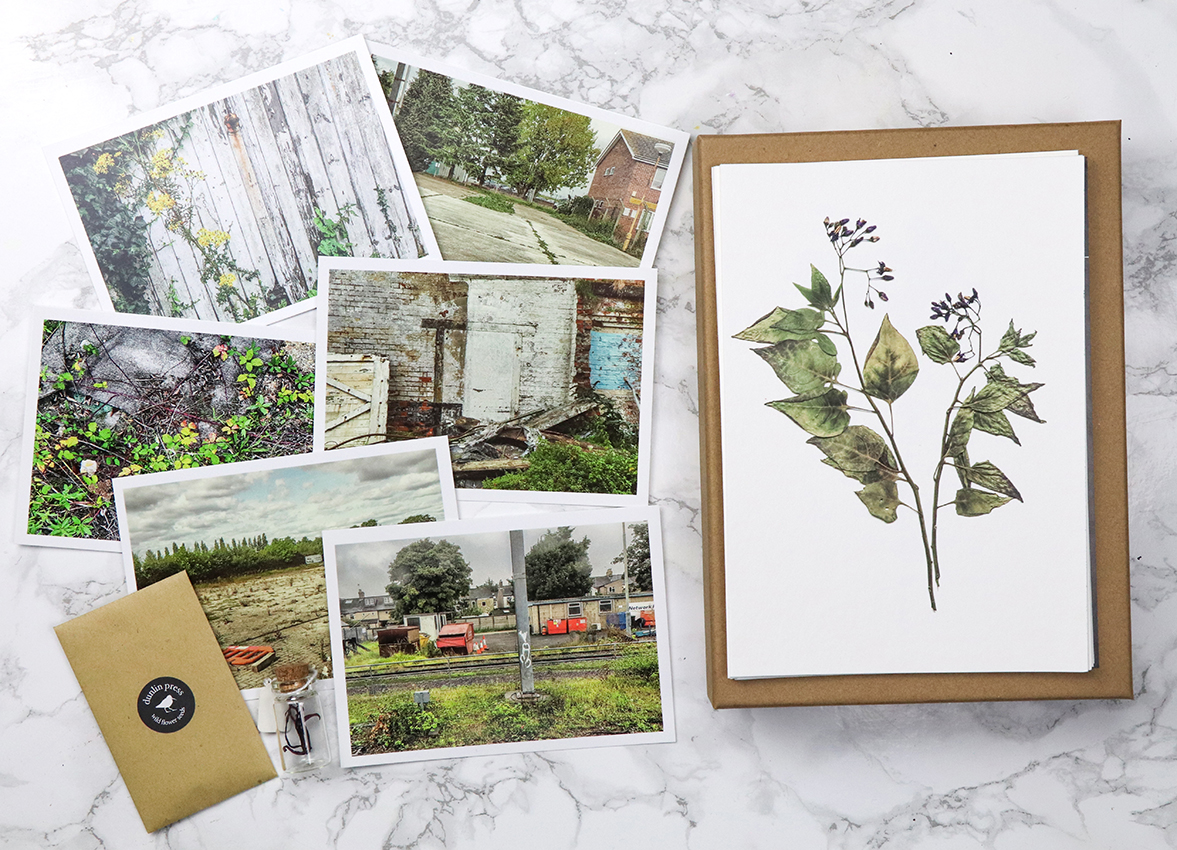
The box set contains the following elements:

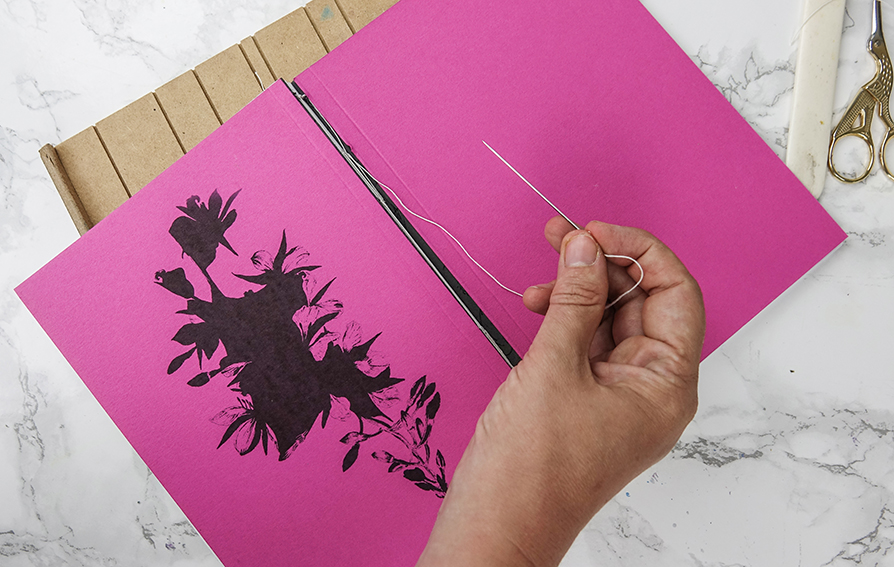
1: Hand-stitched ‘Journal’
Coverstock: G.F SMith, Colorplan, fuchsia pink, 270gsm. Inset pages: G.F SMith, Colorplan, dark grey, 135gsm. Inner pages: ZANDERS ZETA, Unwatermarked Textured Paper, linen 100gsm,
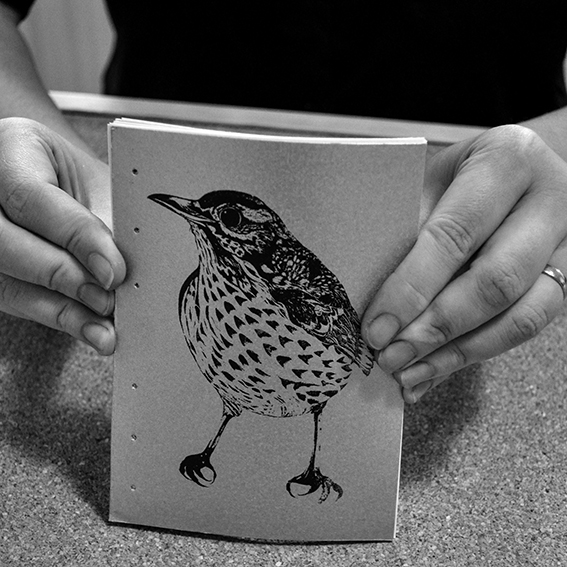
2: Hand-stitched black and white studies booklet
Paper stock: Hahnemühle, Photo Rag, matte smooth, 188gsm
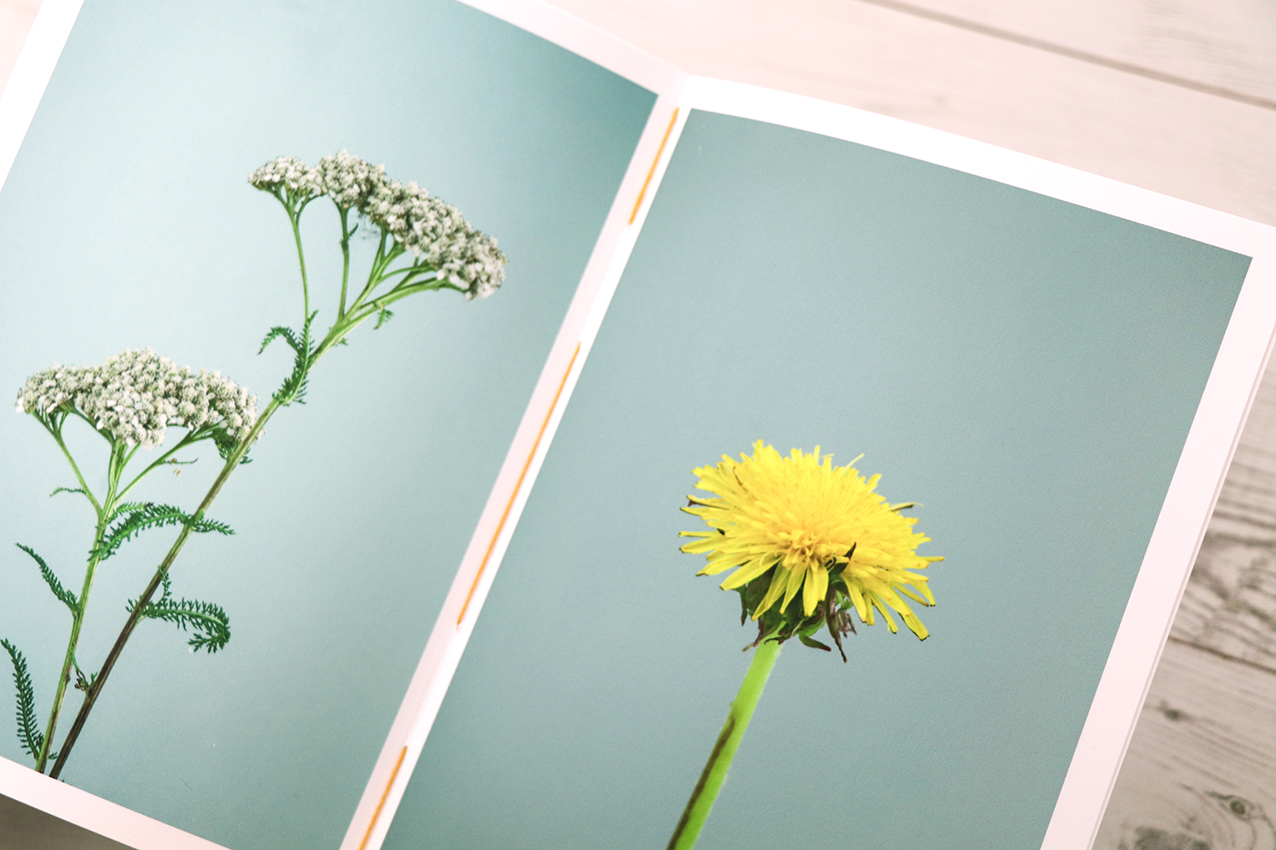
3: Hand-stitched wild flower still lives booklet
Paper stock: Hahnemühle, Photo Rag, matte smooth, 188gsm
4: 10 pressed plants fine art giclée prints
Printed on archival Hahnemühle, Photo Rag, bamboo, 290gsm
5: Six landscape postcards
6: A glass bottle ‘reliquary’
7: Wildflower seeds include a mixture of annual and perennial wildflower species and grasses.
8: Bookmark using G.F SMith, Colorplan, dark grey, 135gsm

The Orphaned Spaces box set includes three individually hand-stitched books and archival prints plus seeds and reliquary

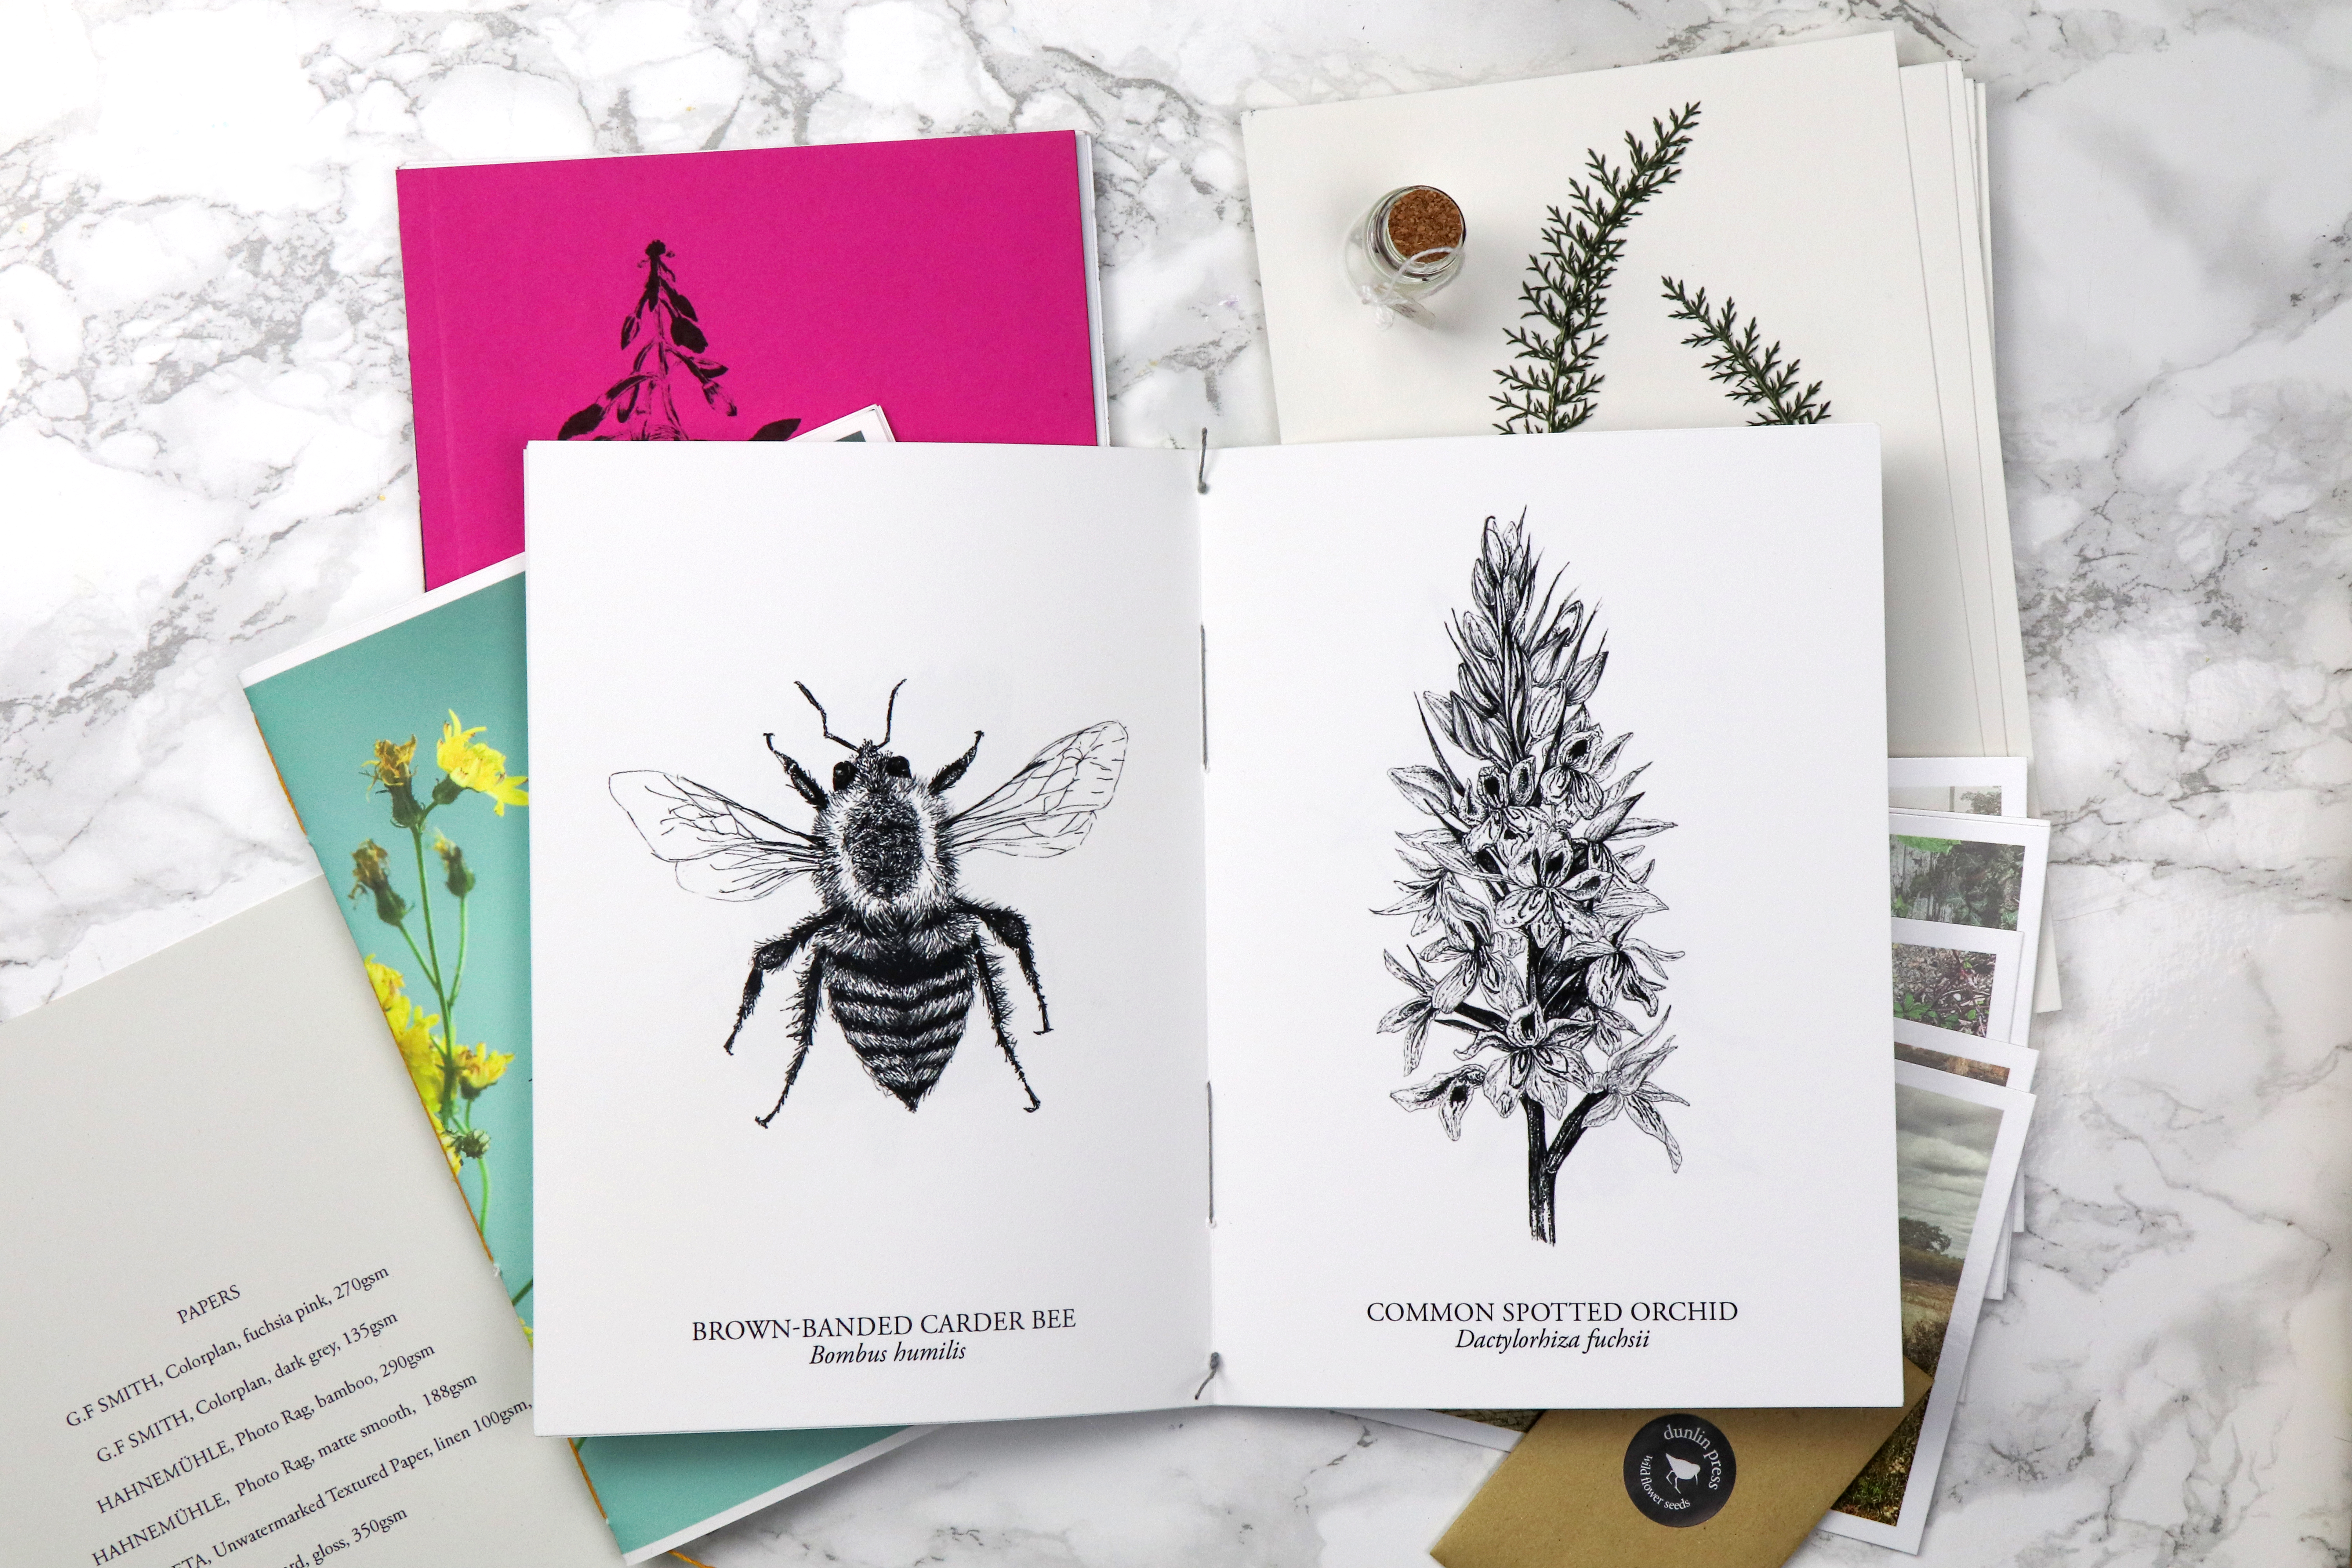
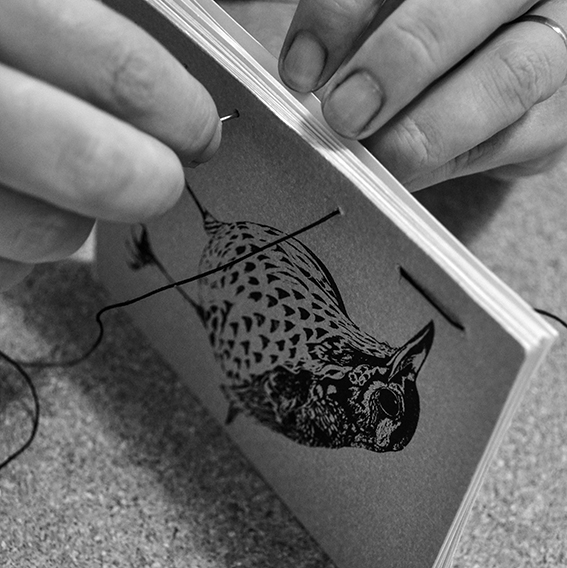
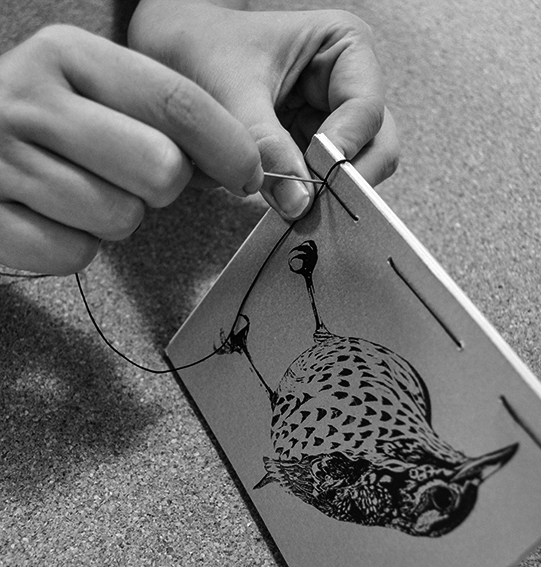
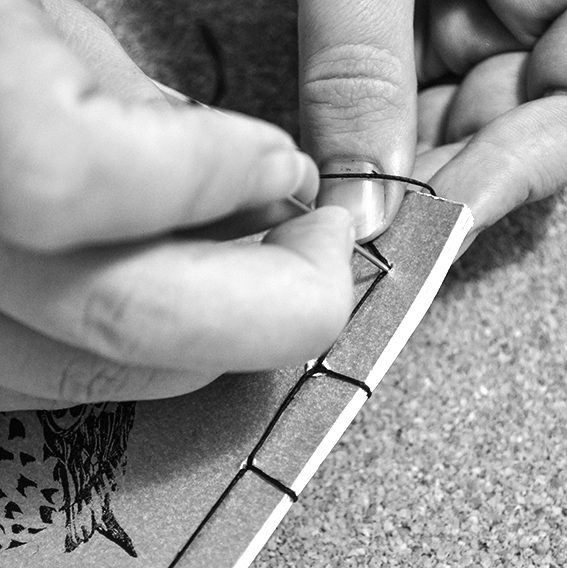
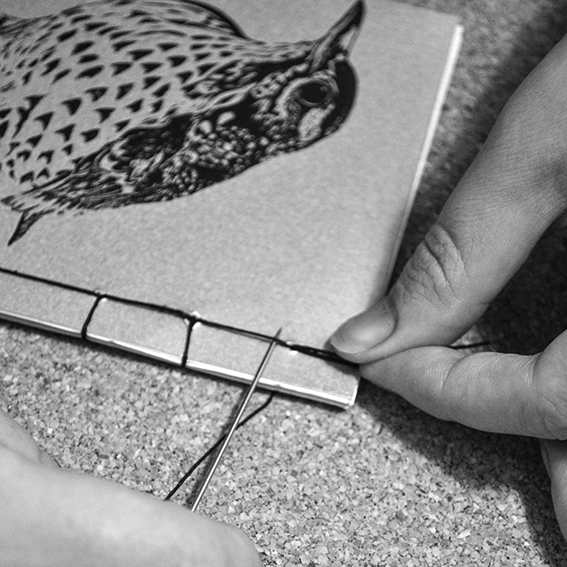
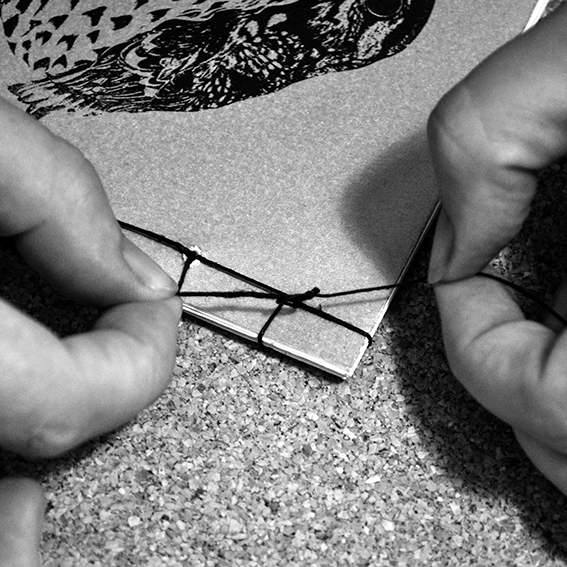
I’ve really made use of the 2010 Central St Martin book-binding summer course I attended during the past eight years. The box set features three hand-stitched booklets all bound by me. I really enjoy book-making so, what would feel like hard work for some feels like a kind of zen meditative process for me.

Making the hand-stitched books for The Orphaned Spaces.

You can buy the box set or the book at the Dunlin Press shop.

Posted on

How to make a book in eight easy steps

If you are anything like me you’ll have loads of spare bits of patterned, or even plain, card and reams of paper lying around. I’ve got a great little Japanese stab-bound book project that uses up all your stash and is brilliant for when you want to make handmade gifts for people.

So here’s how to make a book in eight easy steps. I’ve screenprinted one of my bird illustrations onto a card cover of my book but you can make yours with anything you like.

Handmade book (c) Ella's Place


YOU WILL NEED
Awl
Ruler
Pencil
Two sheets of A6 card for your cover
15 sheets of 120gsm A6 paper
Book-binding thread and needle
Rough paper (same size as your book pages and card)

(c) Ella's Place1: Use rough paper to make a template. With a ruler, draw a line from top to bottom of the rough at 1cm from the spine. Starting 1cm from the top, mark off an even number of points spaced evenly on that line.

(c) Ella's place

2: Working on a hard, flat surface. Use the awl to make holes in the intersections as shown – I’m protecting my table (and my hands) by placing the paper on a cork board so the awl can ‘sink in’.

(c) Ellas place

(c) Ellas place

3: Place the front cover card underneath the template, holding or clipping the front edge to keep from moving. Protect your work surface as you punch a hole at each of the marked points using an awl. Repeat for the back cover.

(C) Ellas place(c) Ella's Place
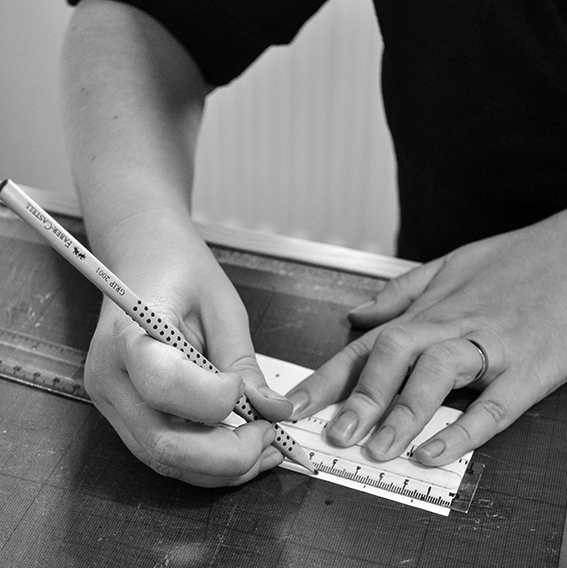
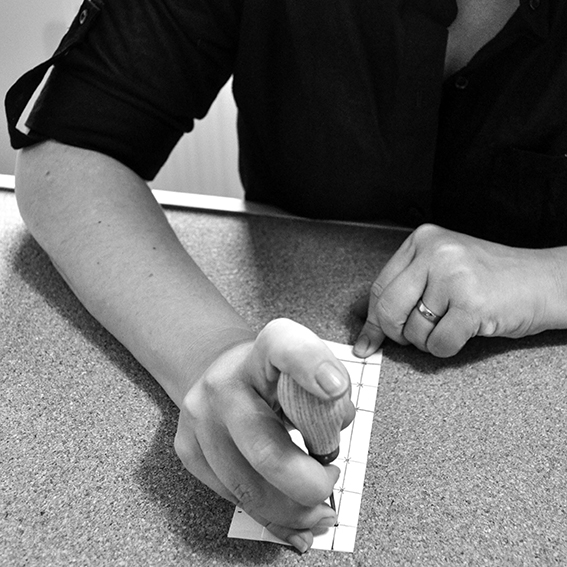
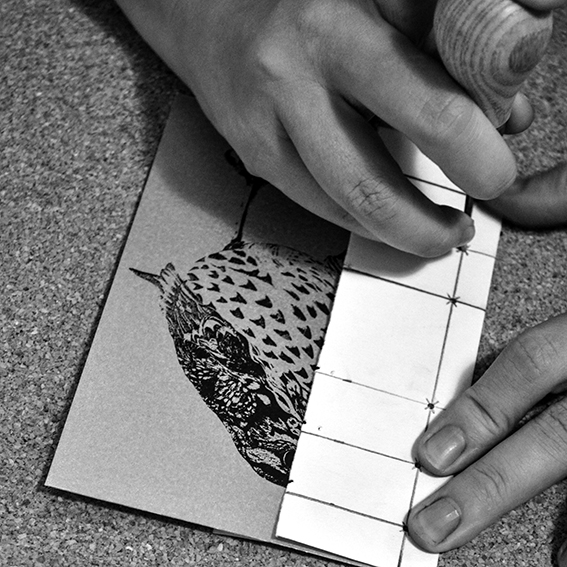
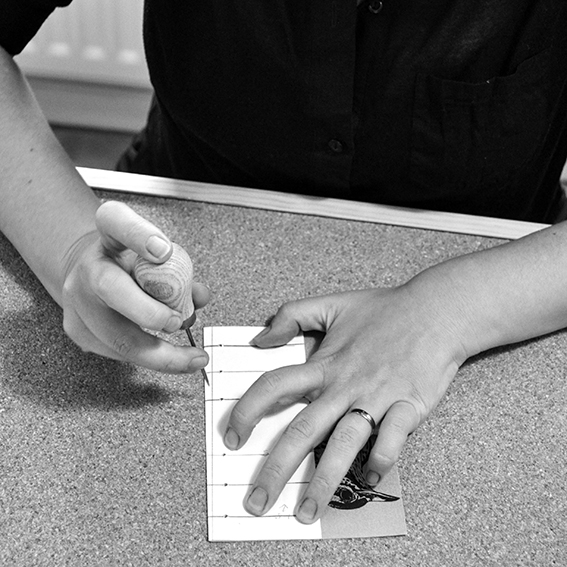
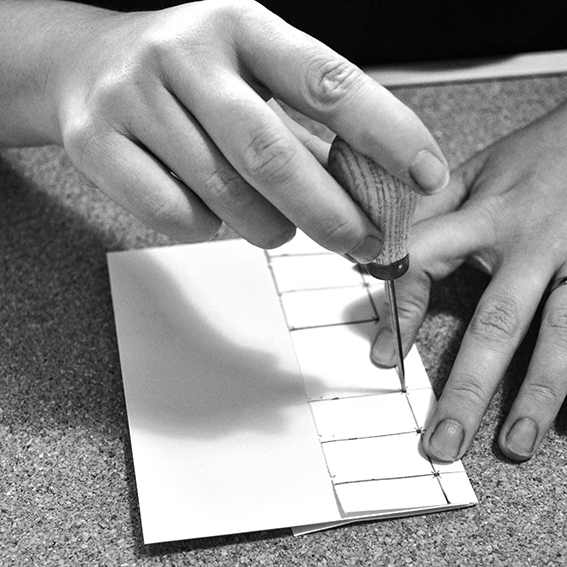
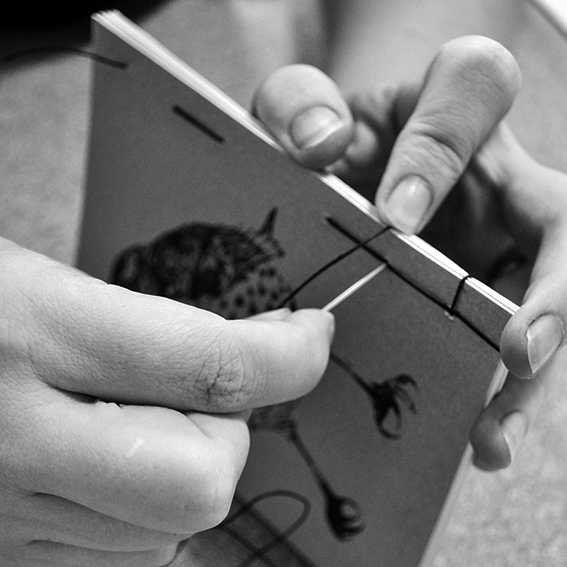
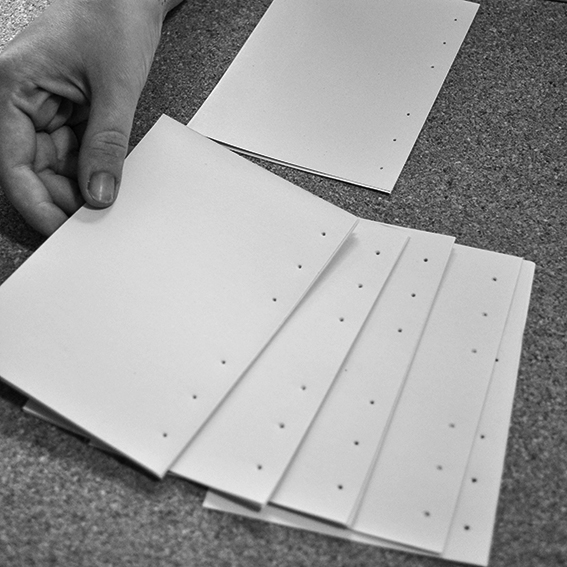
4: Place a quarter of the book pages underneath the template and make holes as shown. Continue with the remaining pages doing quarters at a time. The pages and cover should all look the same once punched.

(c) Ella's Place

(c) Ella's Place5: Put all the pages, including the front and back covers, together. Thread the needle through the top back hole of the book, leaving some thread loose. Make a running stitch along the holes in the book, pulling the thread tight each time through a hole while keeping your top thread loose.

(c) Ella's Place

6: Loop the thread at the bottom of the book’s spine and go through the bottom hole. Place the book on its side, loop around the top of the spine and go through the bottom hole again.

(c) Ella's Place

7: Do a running stitch into the next hole, loop around the top of the spine and go through that hole again on to the next hole. Repeat until you get to the top of the book.

(c) Ella's Place

(c) Ella's Place

(c) Ella's Place8: Make a loop at the top of the book and go through the top hole. Slip the needle under two of the top bindings coming out of starting hole. Tie a tight knot with the original loose thread.

(c) Ella's Place

Look – you’ve made a book!